06. Create SharePoint Credentials
HingePoint Sync service uses SharePoint App-Only for event receivers activation and sync content from different systems (Windows and Procore) to SharePoint.
The article below described how to create and assign permissions for SharePoint App-Only.
Note: The user must have the Global Administrator role in the O365 (M365) tenant to complete all steps from this topic.
App registration
Note: SharePoint Administrator role in the O365 (M365) tenant are the minimum permissions to complete the following steps.
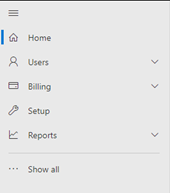
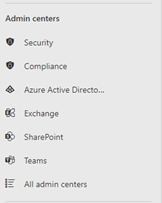
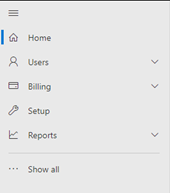
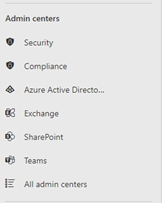
Step 1: Open O365 (M365) admin center using URL https://admin.microsoft.com and select SharePoint in the Admin Centers section in the left navigation. Select Show All if you cannot see Admin Centers section:
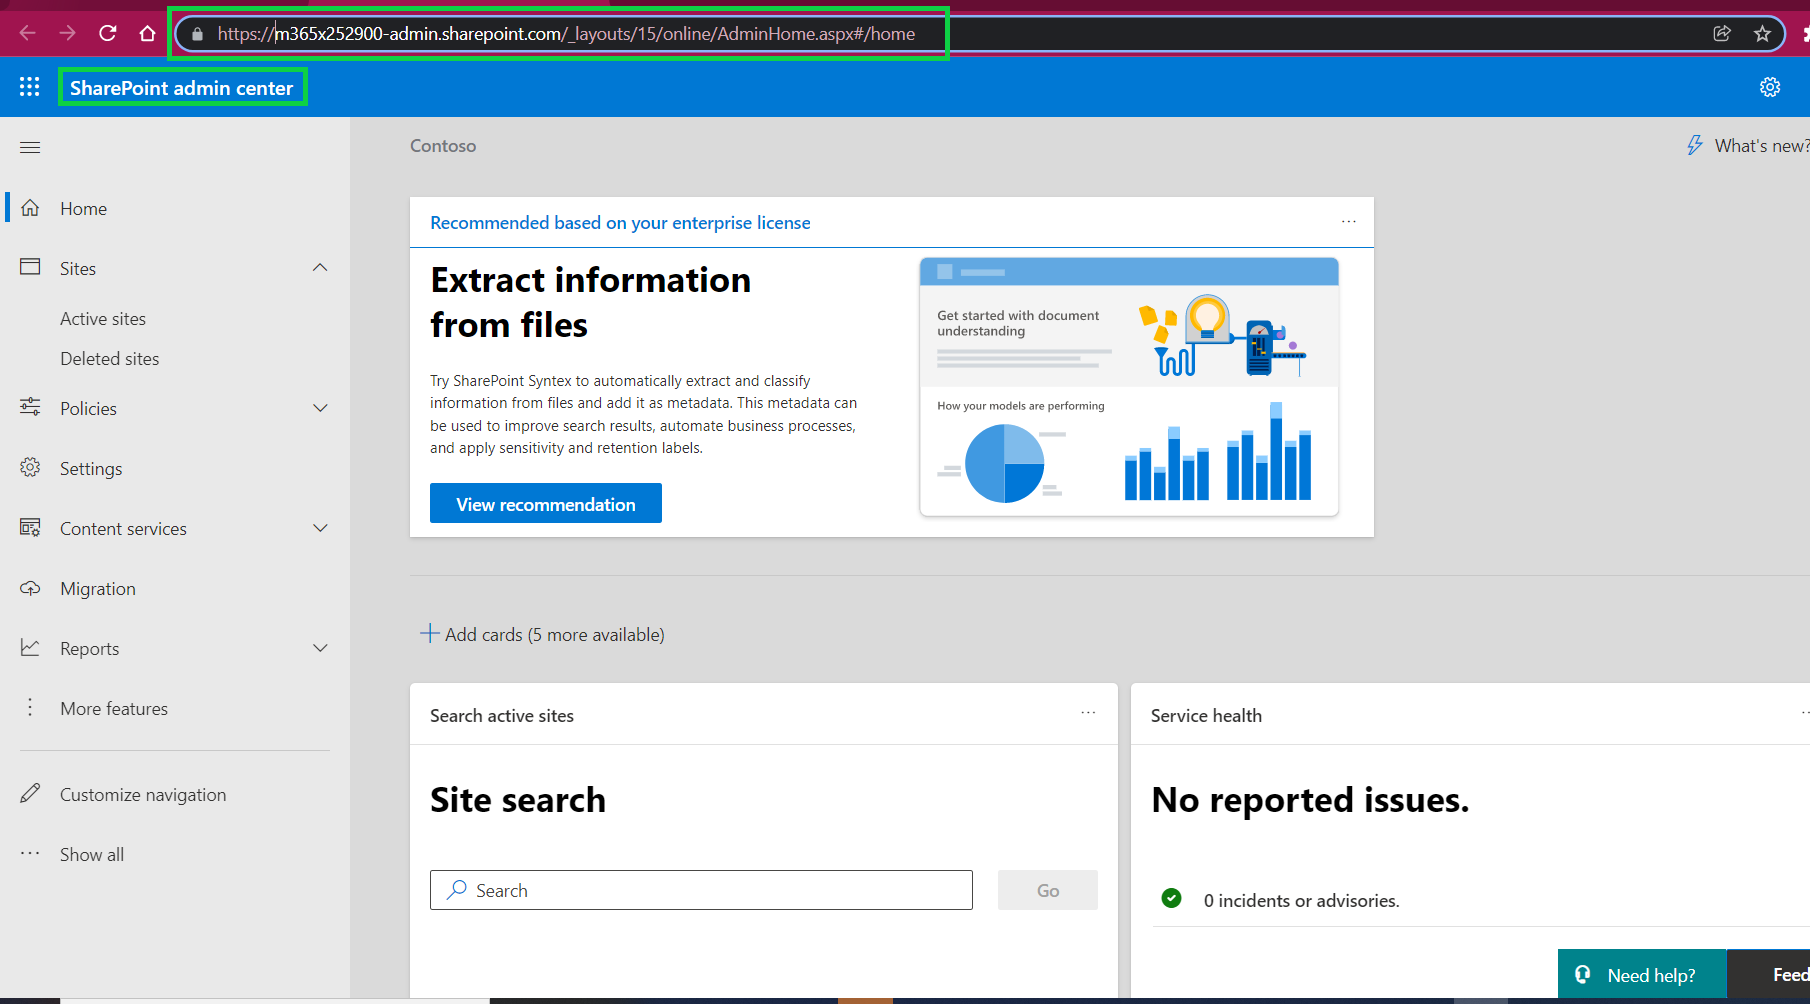
Step 2: In the opened tab replace "/online/AdminHome.aspx#/home" with "/appregnew.aspx" in the URL and open it. Your URL should look like the one displayed below:
https://<YourWebsite>-admin.sharepoint.com/_layouts/15/appregnew.aspx
Example: https://hingepoint-admin.sharepoint.com/_layouts/15/appregnew.aspx
NOTE: “-Admin” is included in the URL.
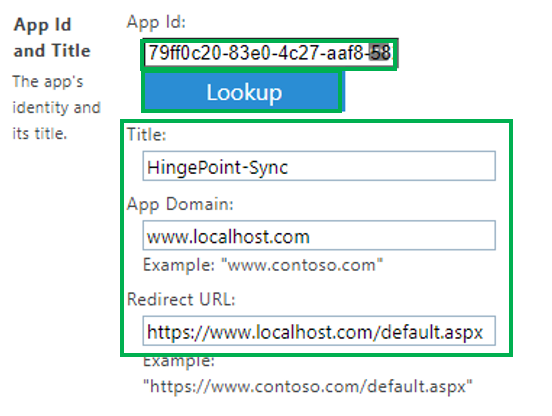
Step 3: Generate ClientID and Client Secret and fill the Title, App Domain and Redirect URL using values from below. Select Create:
Title: HingePoint-Sync
App Domain: www.localhost.com
Redirect URL: https://www.localhost.com/default.aspx
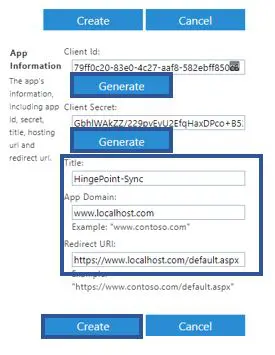
Step 4: Select Ok in the next screen.
Note: Please save Client ID and Client Secret in the secure password storage. You can not get Client Secret after you create the app only by creating the new app.
Assign permissions for Tenant Wide (for all sites in the tenant)
Note: Global Administrator role needed in the O365 (M365) tenant to complete the following steps.
Step 1: Open O365 (M365) admin center using URL https://admin.microsoft.com and select SharePoint in the Admin Centers section in the left navigation. Select Show All if you cannot see Admin Centers section:
Step 2: In the opened tab replace "/online/AdminHome.aspx#/home" with "/appinv.aspx" in the URL and open it (example of full URL is https://hingepoint-admin.sharepoint.com/_layouts/15/appinv.aspx).
Step 3: Put Client ID from previous topic to App Id and select Lookup (other fields should be auto populated):
Step 4: Put below settings to Permission Request XML:
<AppPermissionRequests AllowAppOnlyPolicy= "true">
<AppPermissionRequest Scope= "http://sharepoint/content/tenant" Right= "FullControl" />
</AppPermissionRequests>

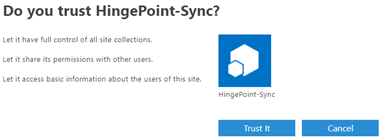
Step 5: Select Create and Trust It in the next screen:

Assign permissions for Site Wide (for a particular site)
Note: Site Collection Administrator (site admin)/Site Owner are the minimum permissions for the target site to complete the following steps.
Step 1: Open target SharePoint site and select then Site Contents of the site:

Step 2: In the opened tab replace /viewlsts.aspx?view=14” with “/appinv.aspx” in the URL and open it (example of full URL is https://hingepoint.sharepoint.com/sites/HingePointSync/_layouts/15/appinv.aspx).
Step 3: Put Client ID from previous topic to App Id and select Lookup (other fields should be auto populated):

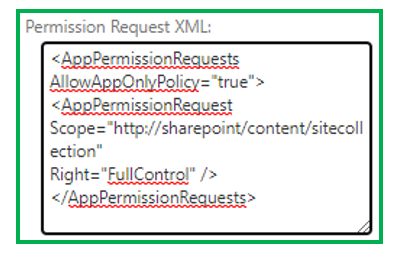
Step 4: Put below settings to Permission Request XML:
<AppPermissionRequests AllowAppOnlyPolicy= "true">
<AppPermissionRequest Scope= "http://sharepoint/content/sitecollection" Right= "FullControl" />
</AppPermissionRequests>
Step 5: Select Create and Trust It in the next screen:
Useful links
Manage SharePoint App-Only
https://docs.microsoft.com/en-us/sharepoint/dev/solution-guidance/security-apponly-azureacs#setting-up-an-app-only-principal-with-tenant-permissions
Manage site admins in SharePoint Online
https://docs.microsoft.com/en-us/sharepoint/manage-site-collection-administrators
Manage SharePoint App-Only
https://docs.microsoft.com/en-us/microsoft-365/admin/add-users/assign-admin-roles?view=o365-worldwide


