How Can We Help?
04. Procore DMSA Keys Validation
How to update an existing Procore Integration to use the DMSA Marketplace App keys?
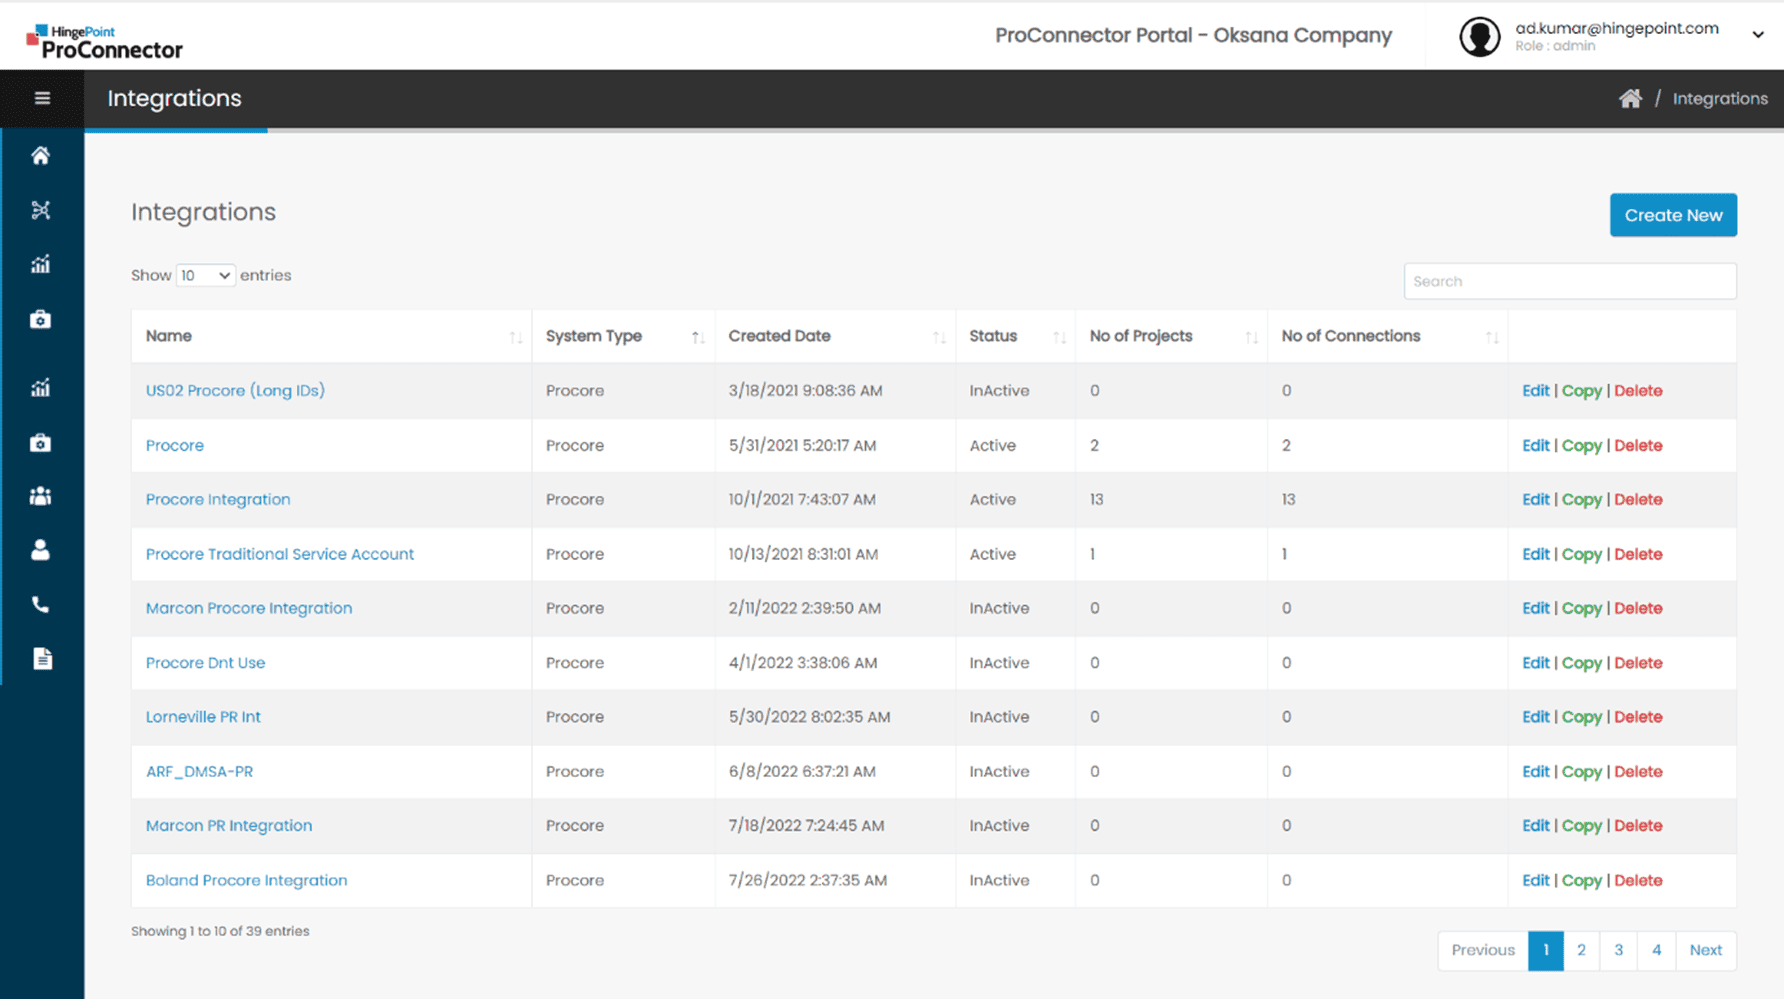
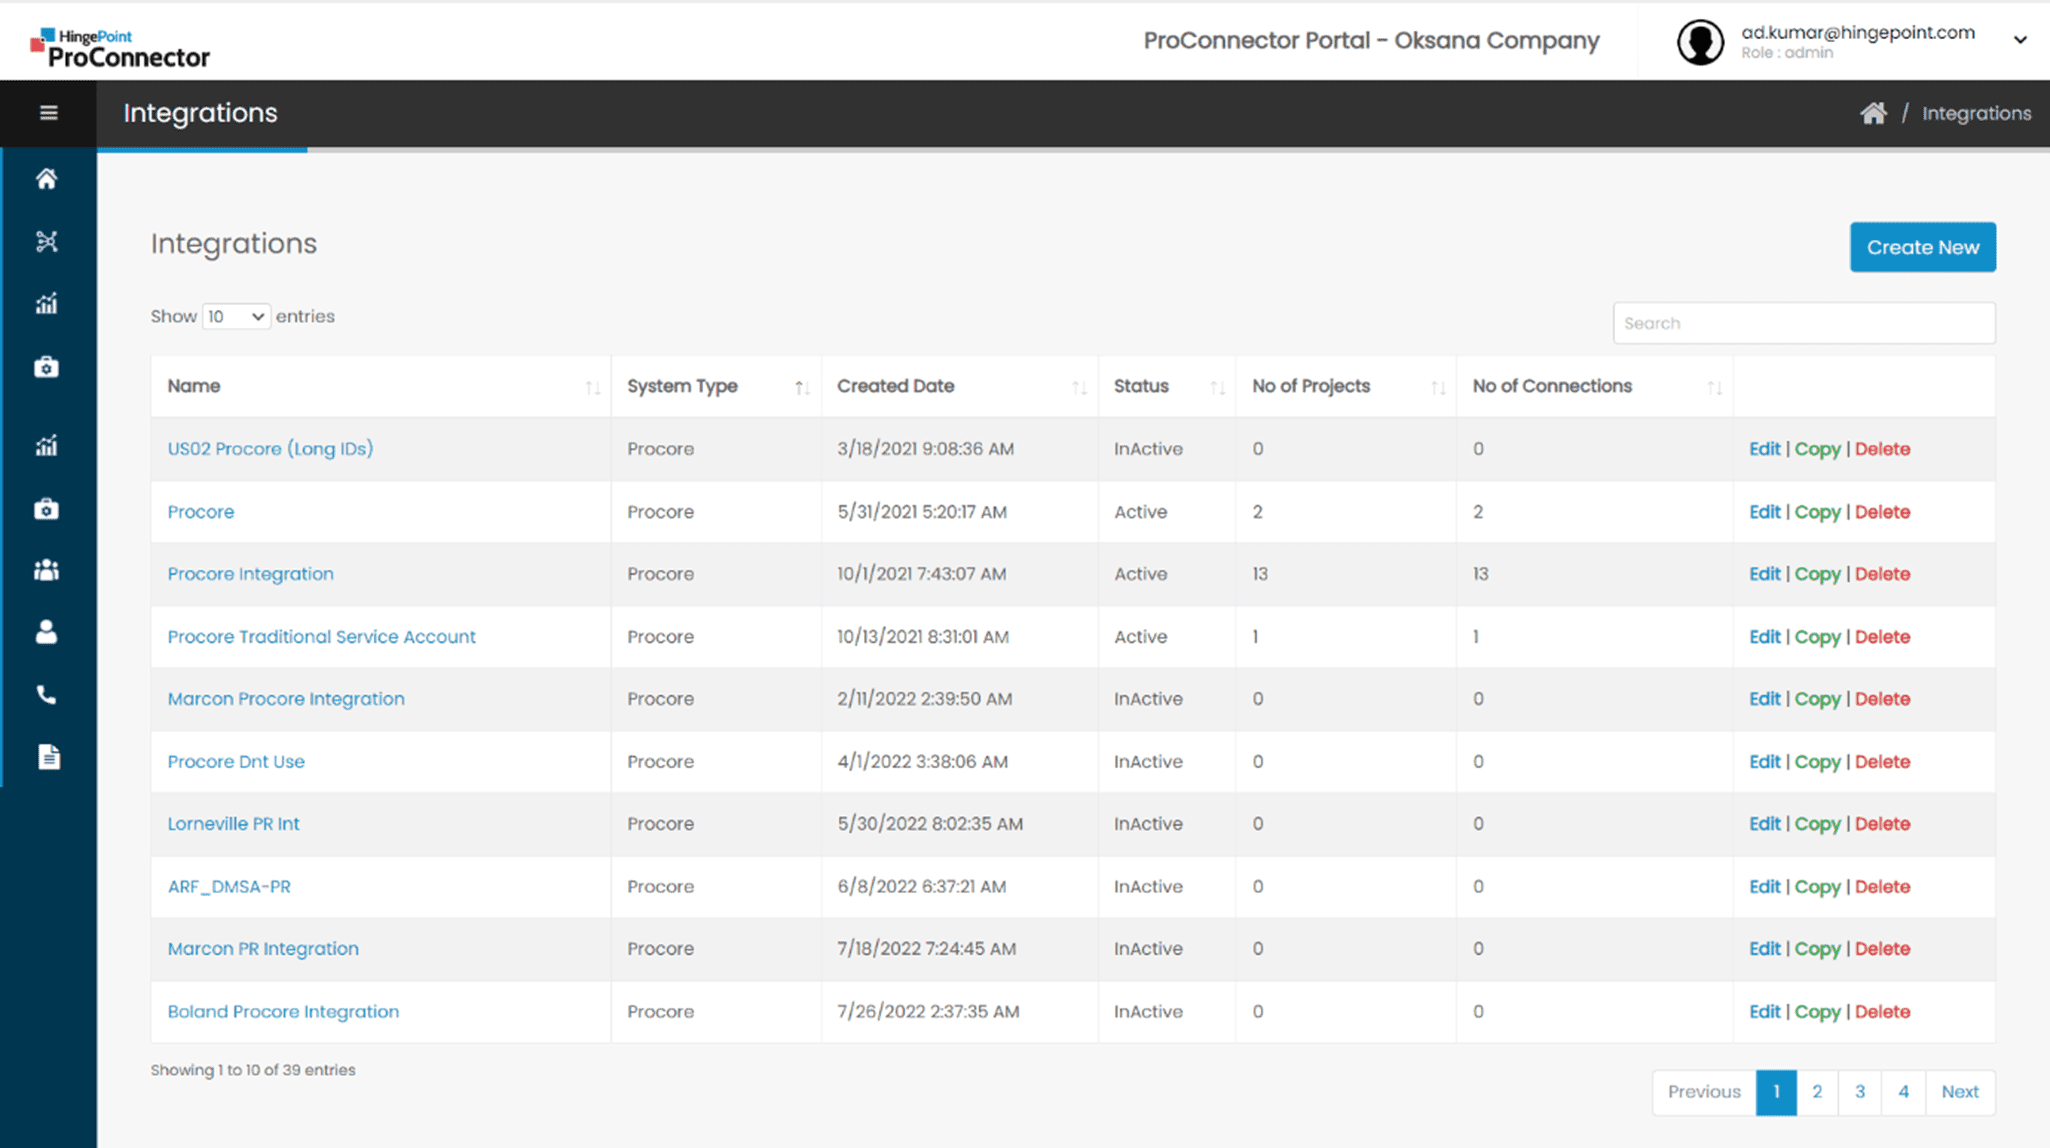
Step 1: Click on Integrations from the navigation menu

Step 2: Click on the Edit link of an existing Procore Integration [which can either have the Traditional service Account keys or the Migrated DMSA keys]
Step 3:
-
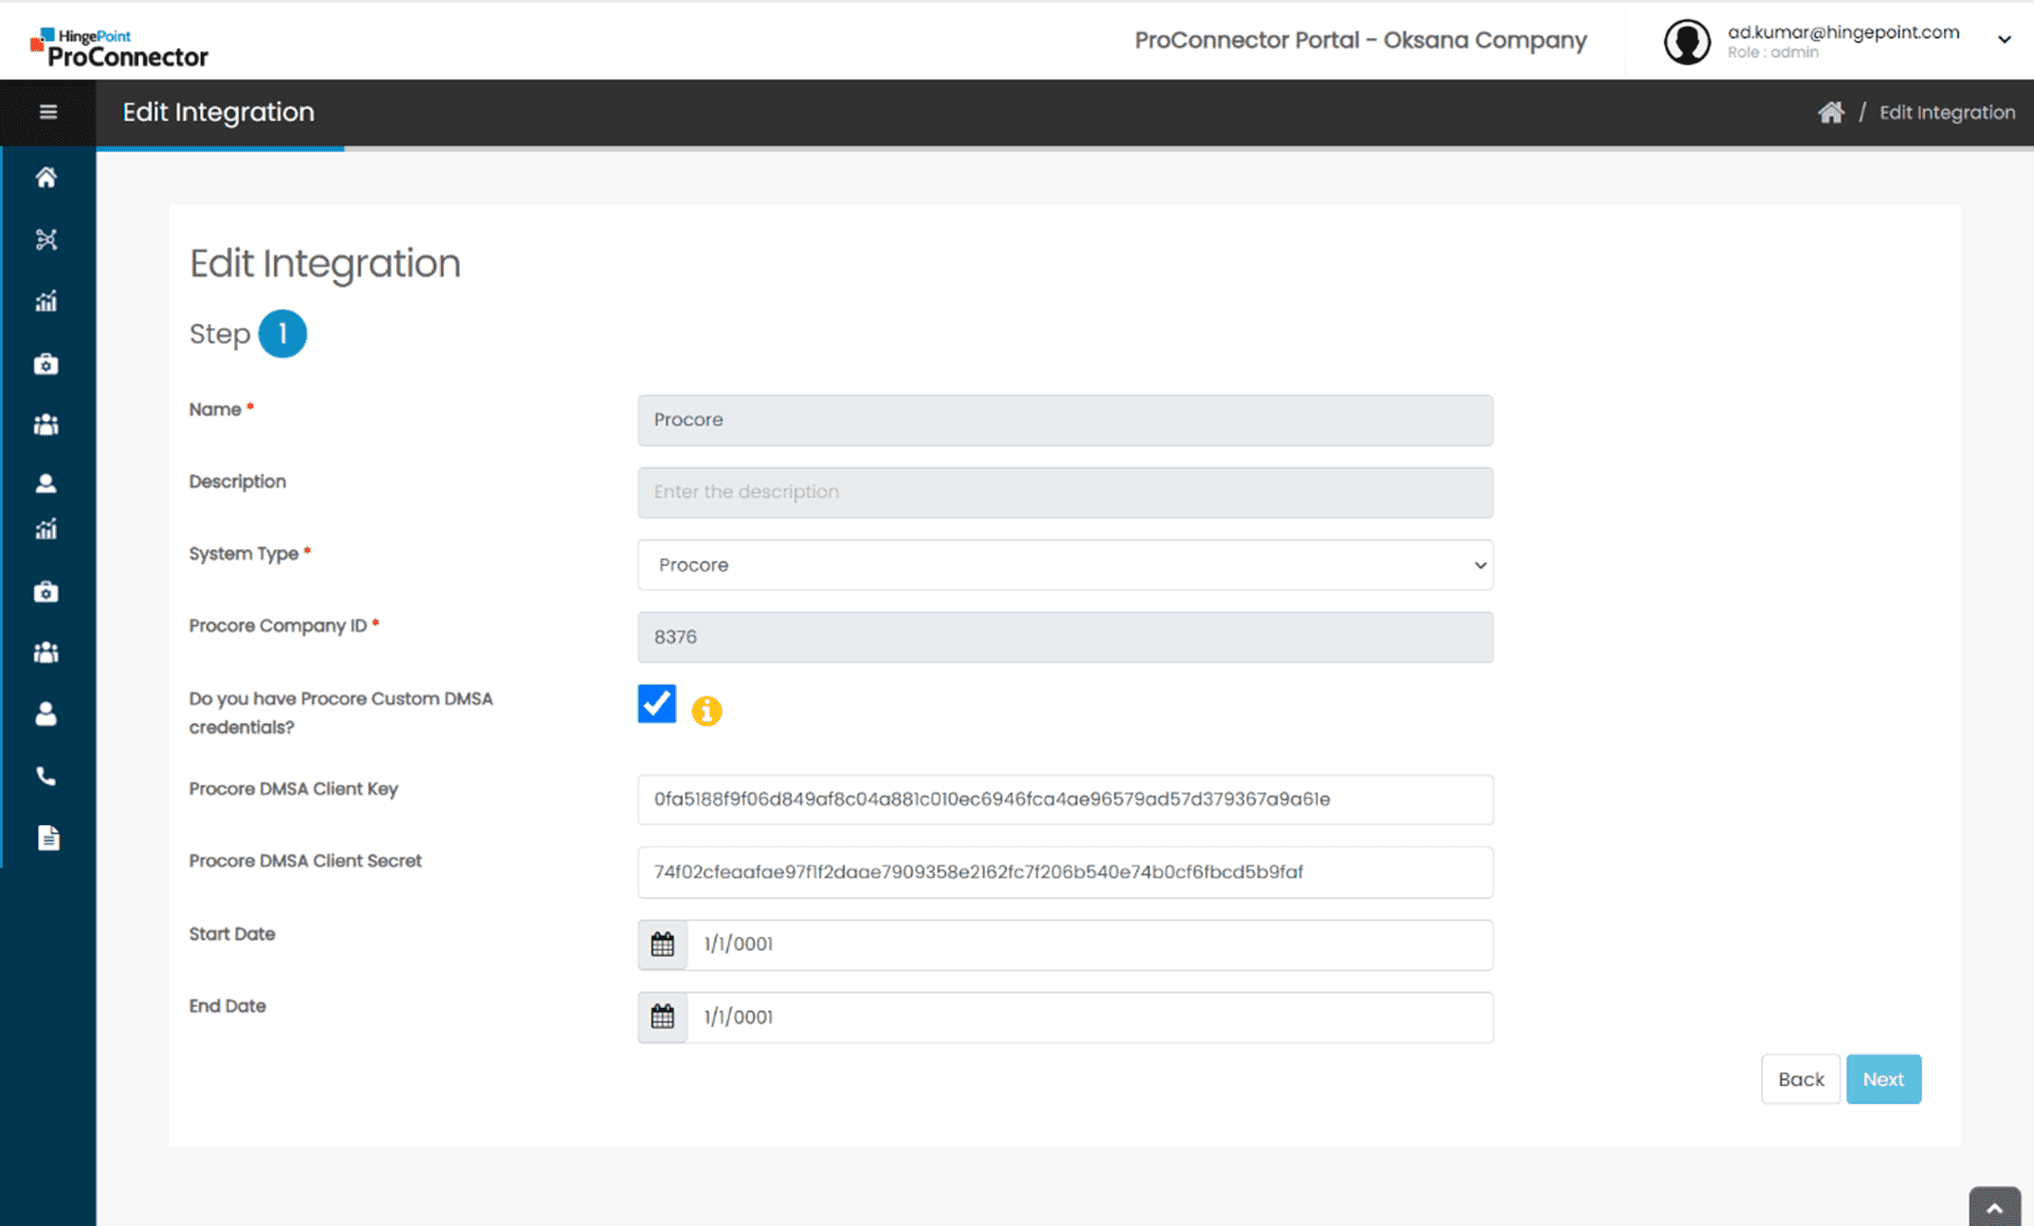
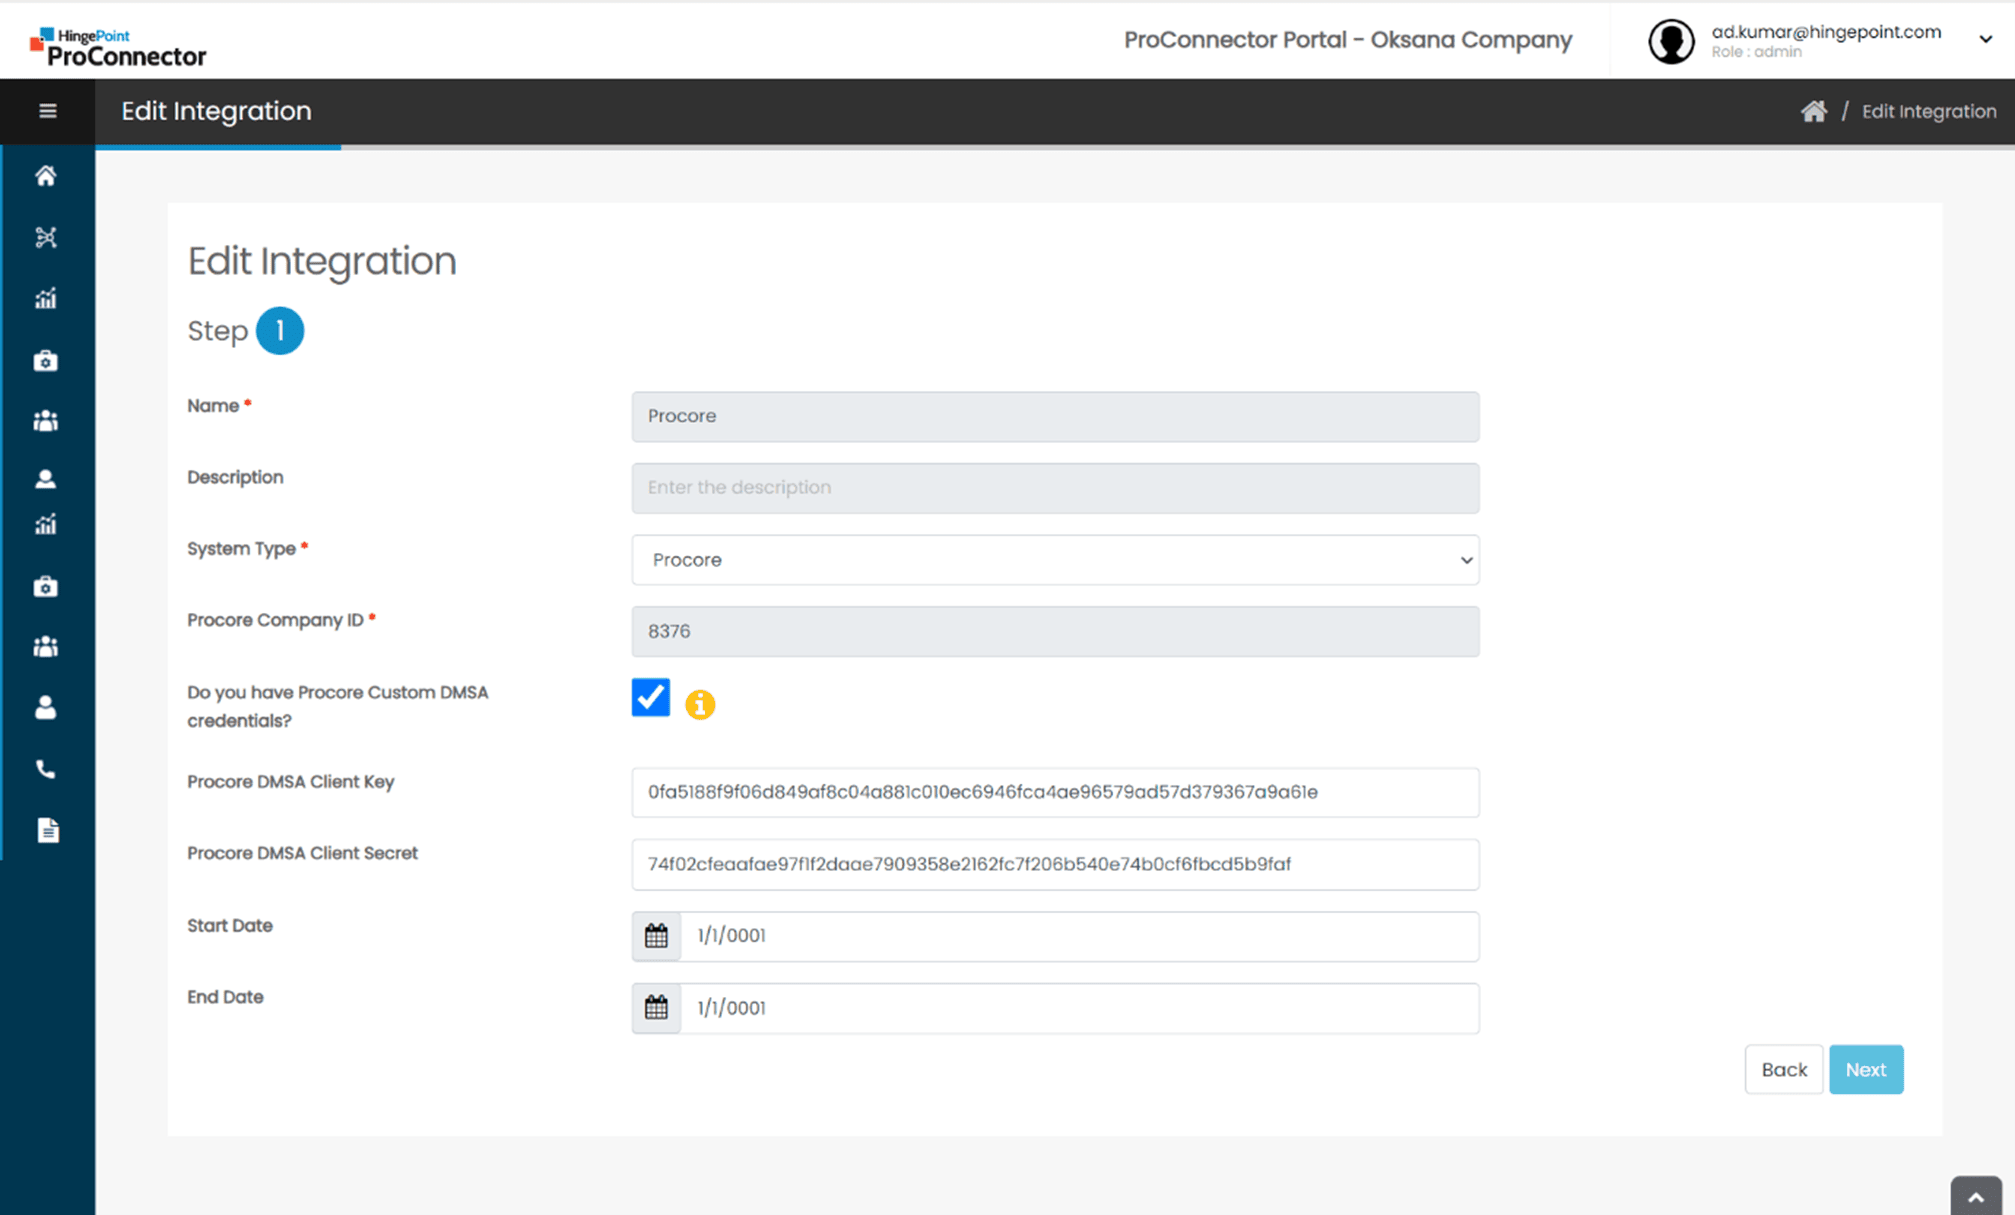
- In the Edit Integration page, the TSA or Custom DMSA credentials will be displayed.

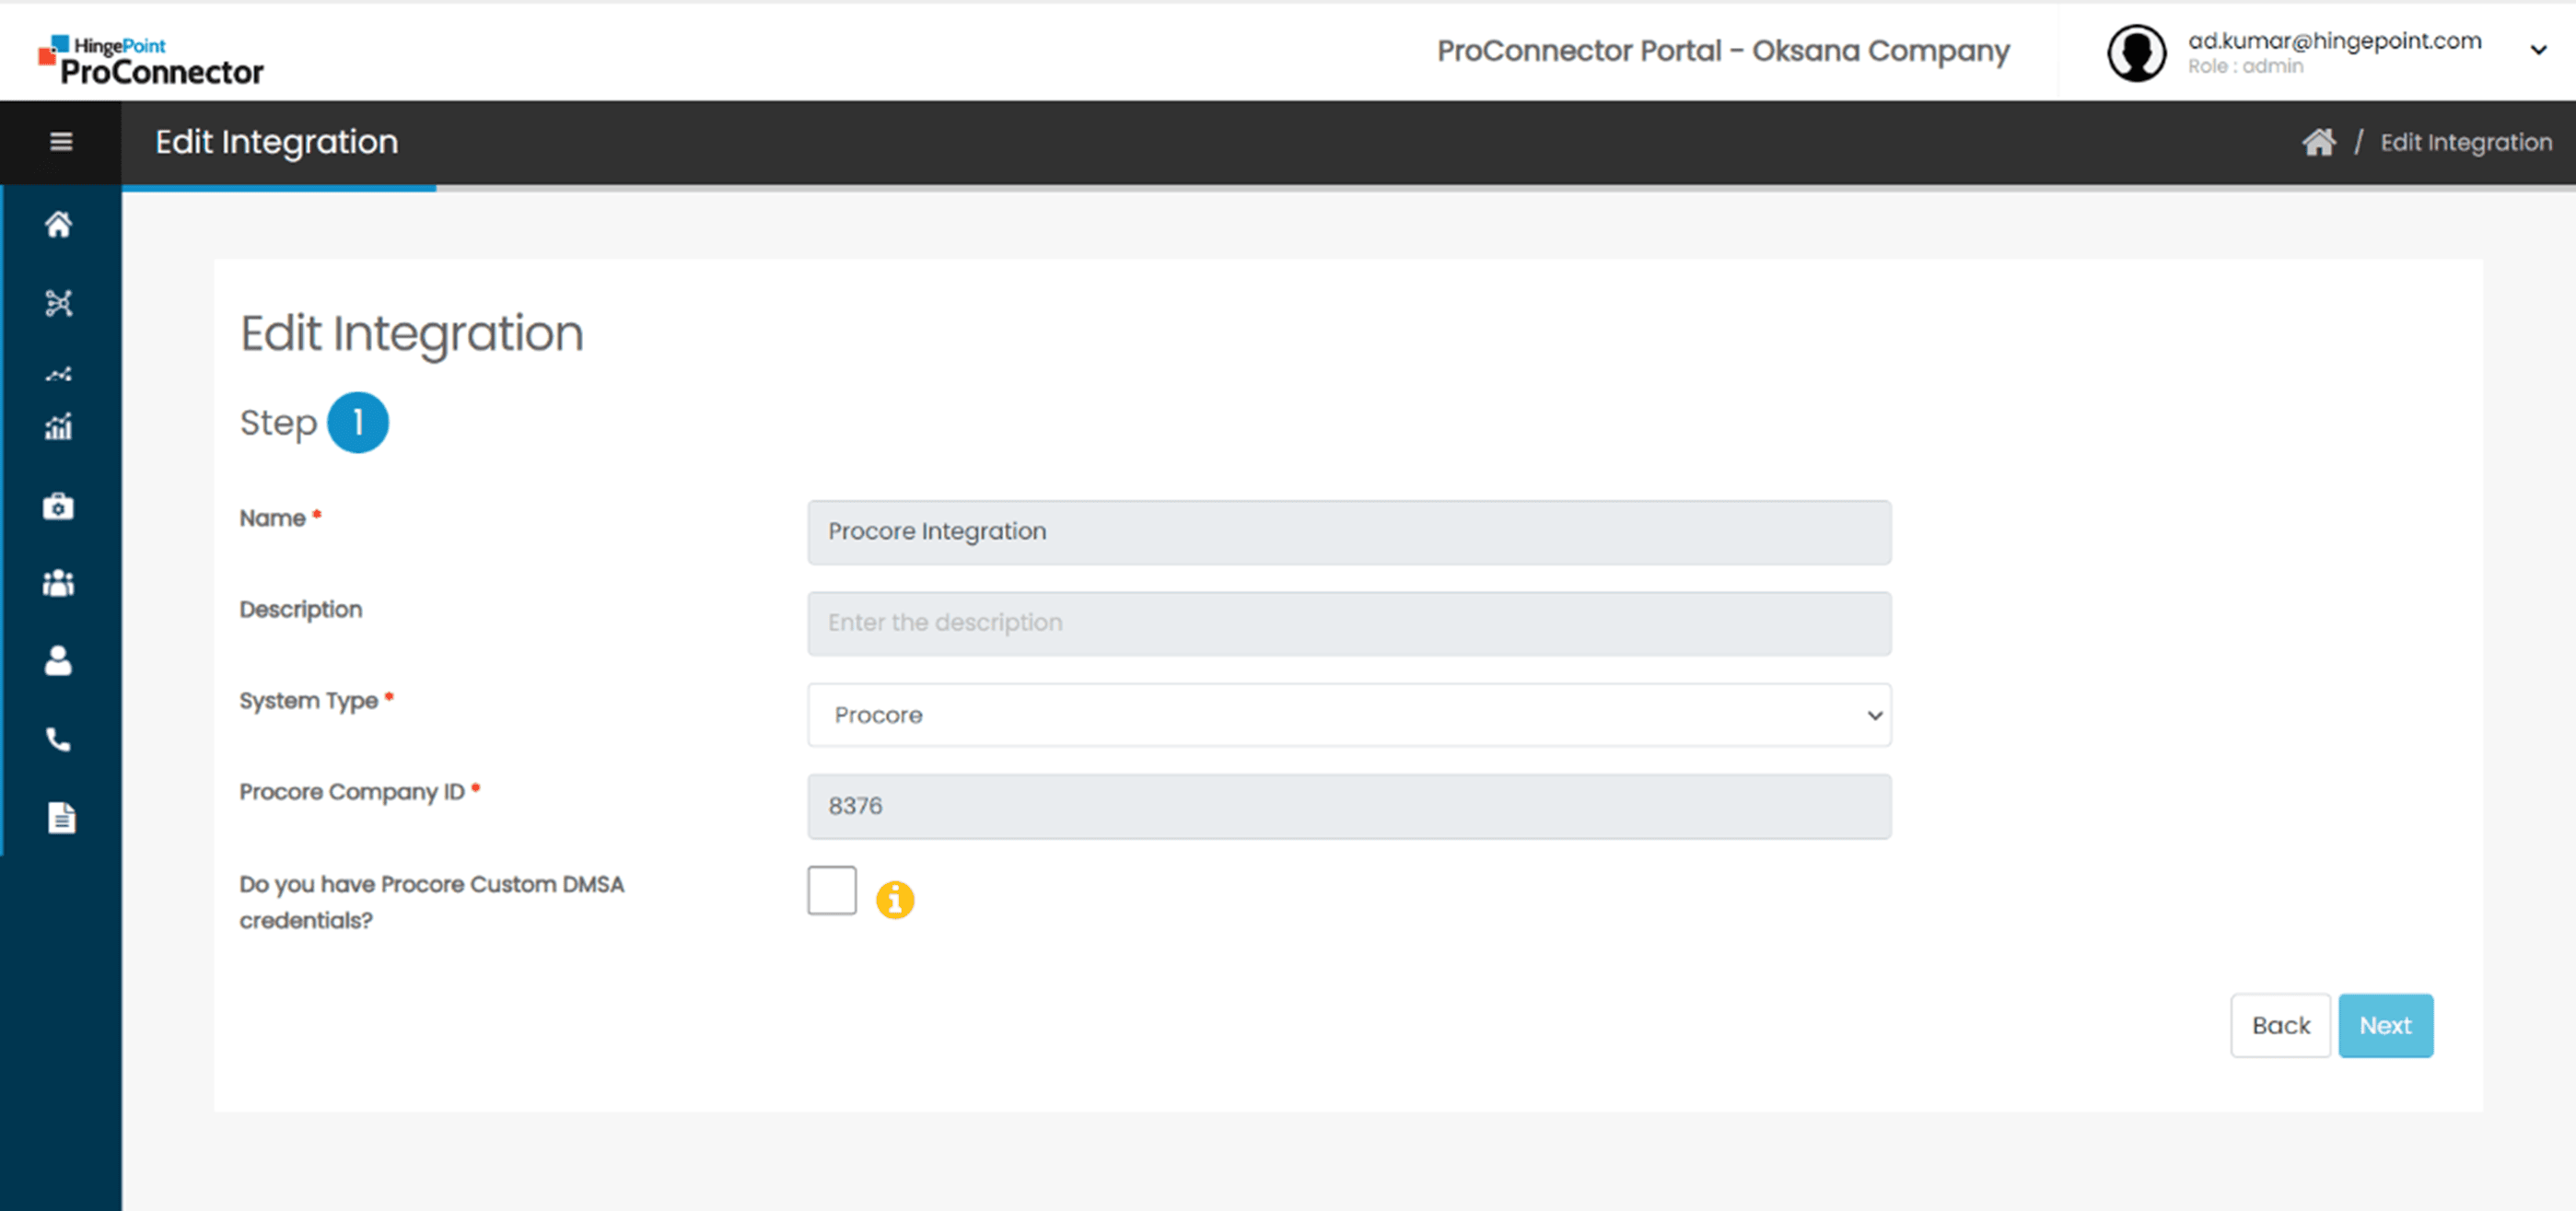
- To update the existing Procore Integration to use the Marketplace App credentials, uncheck the check box for ‘Do you have Procore Custom DMSA credentials’

- In the Edit Integration page, click on the Next button
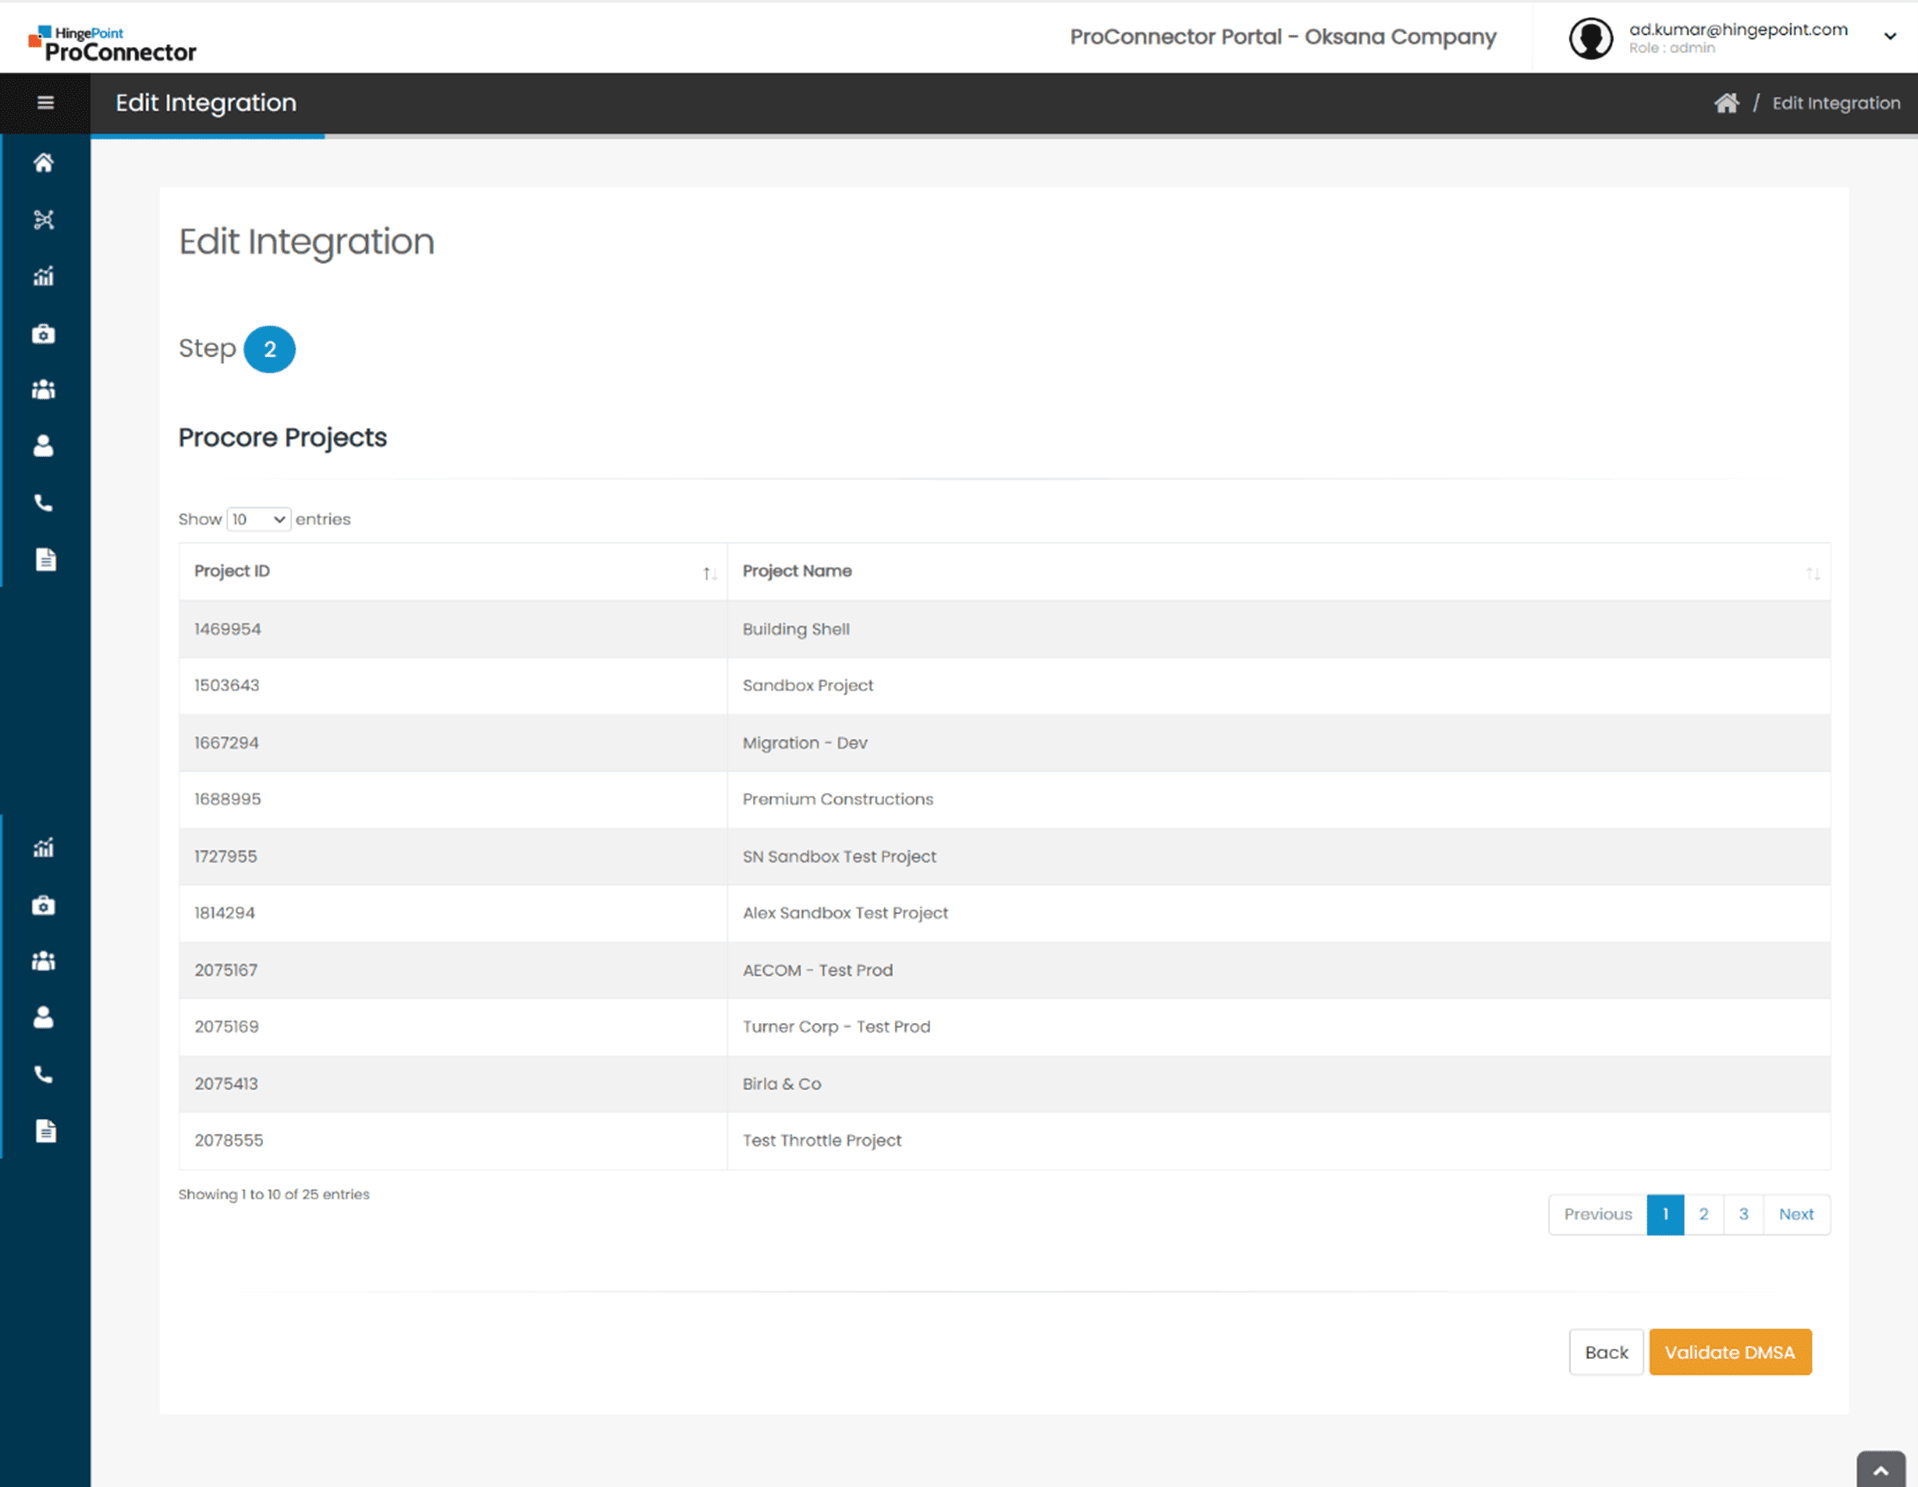
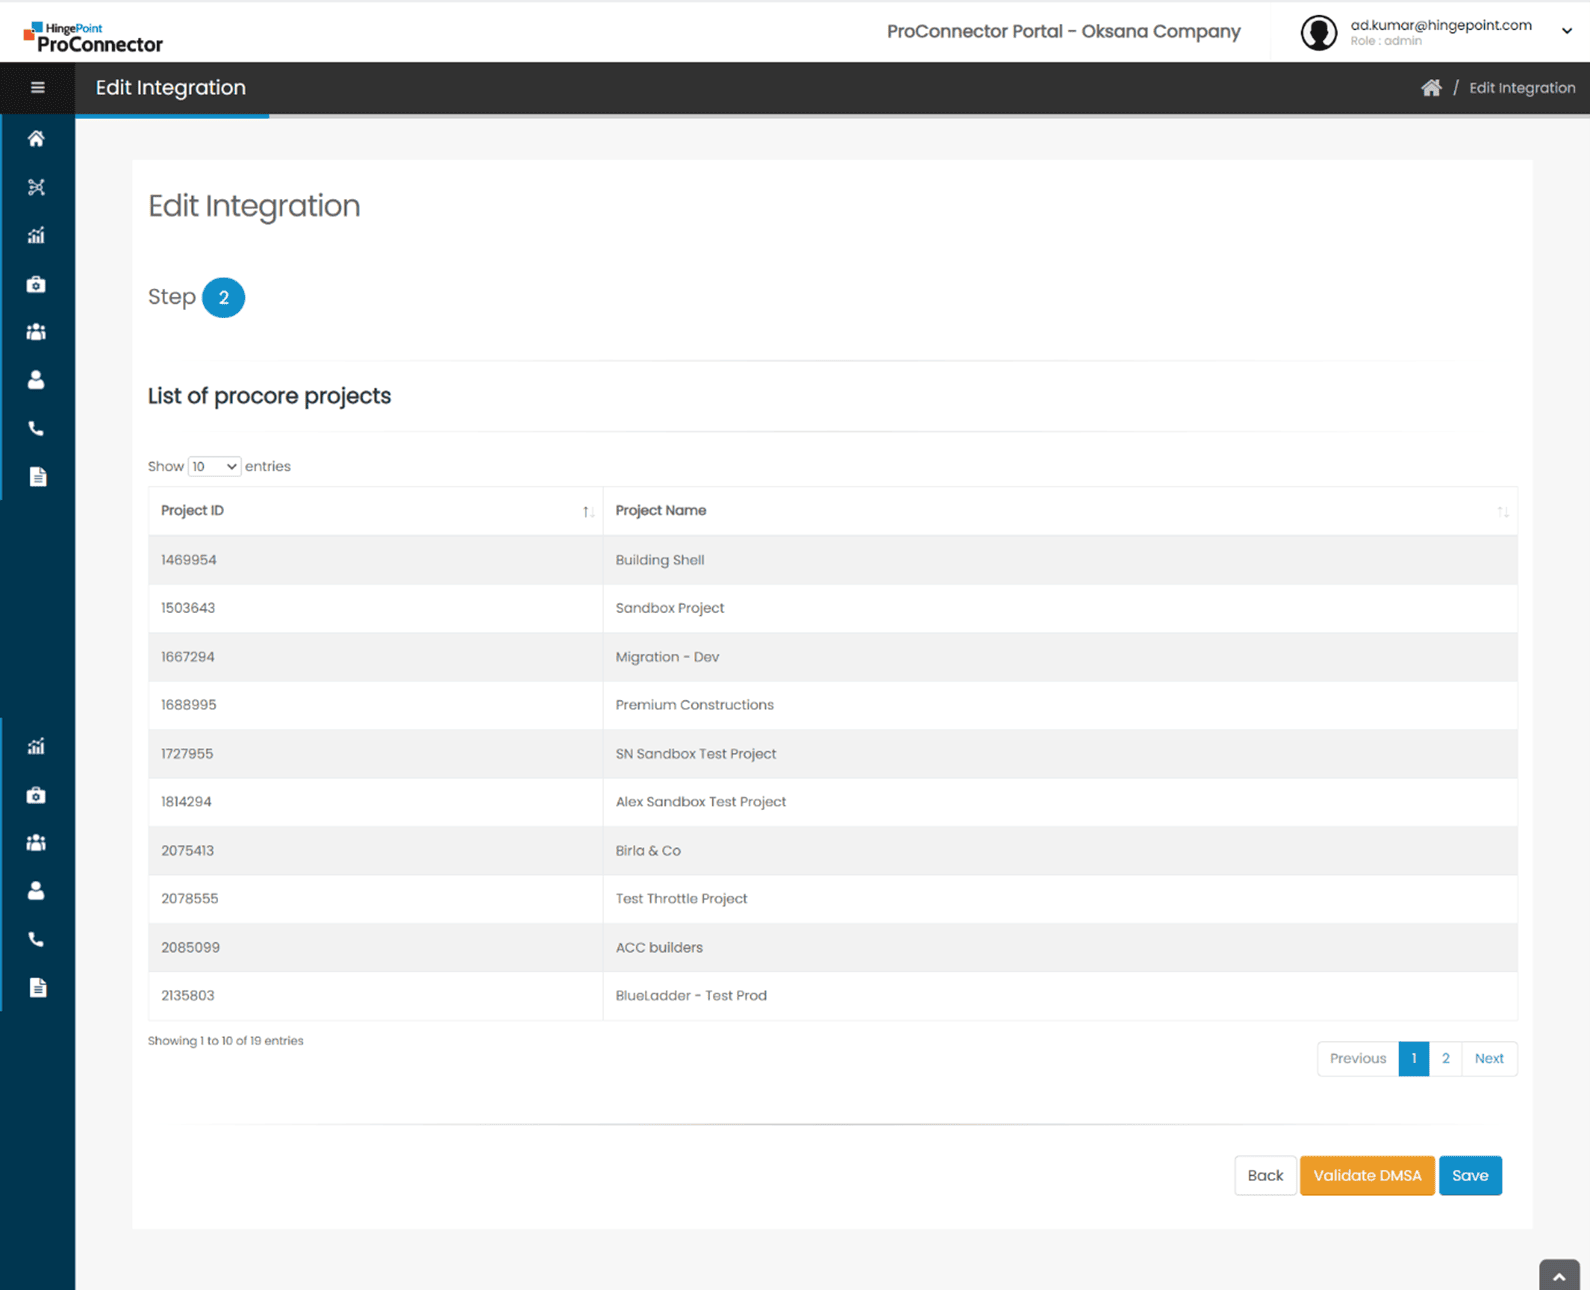
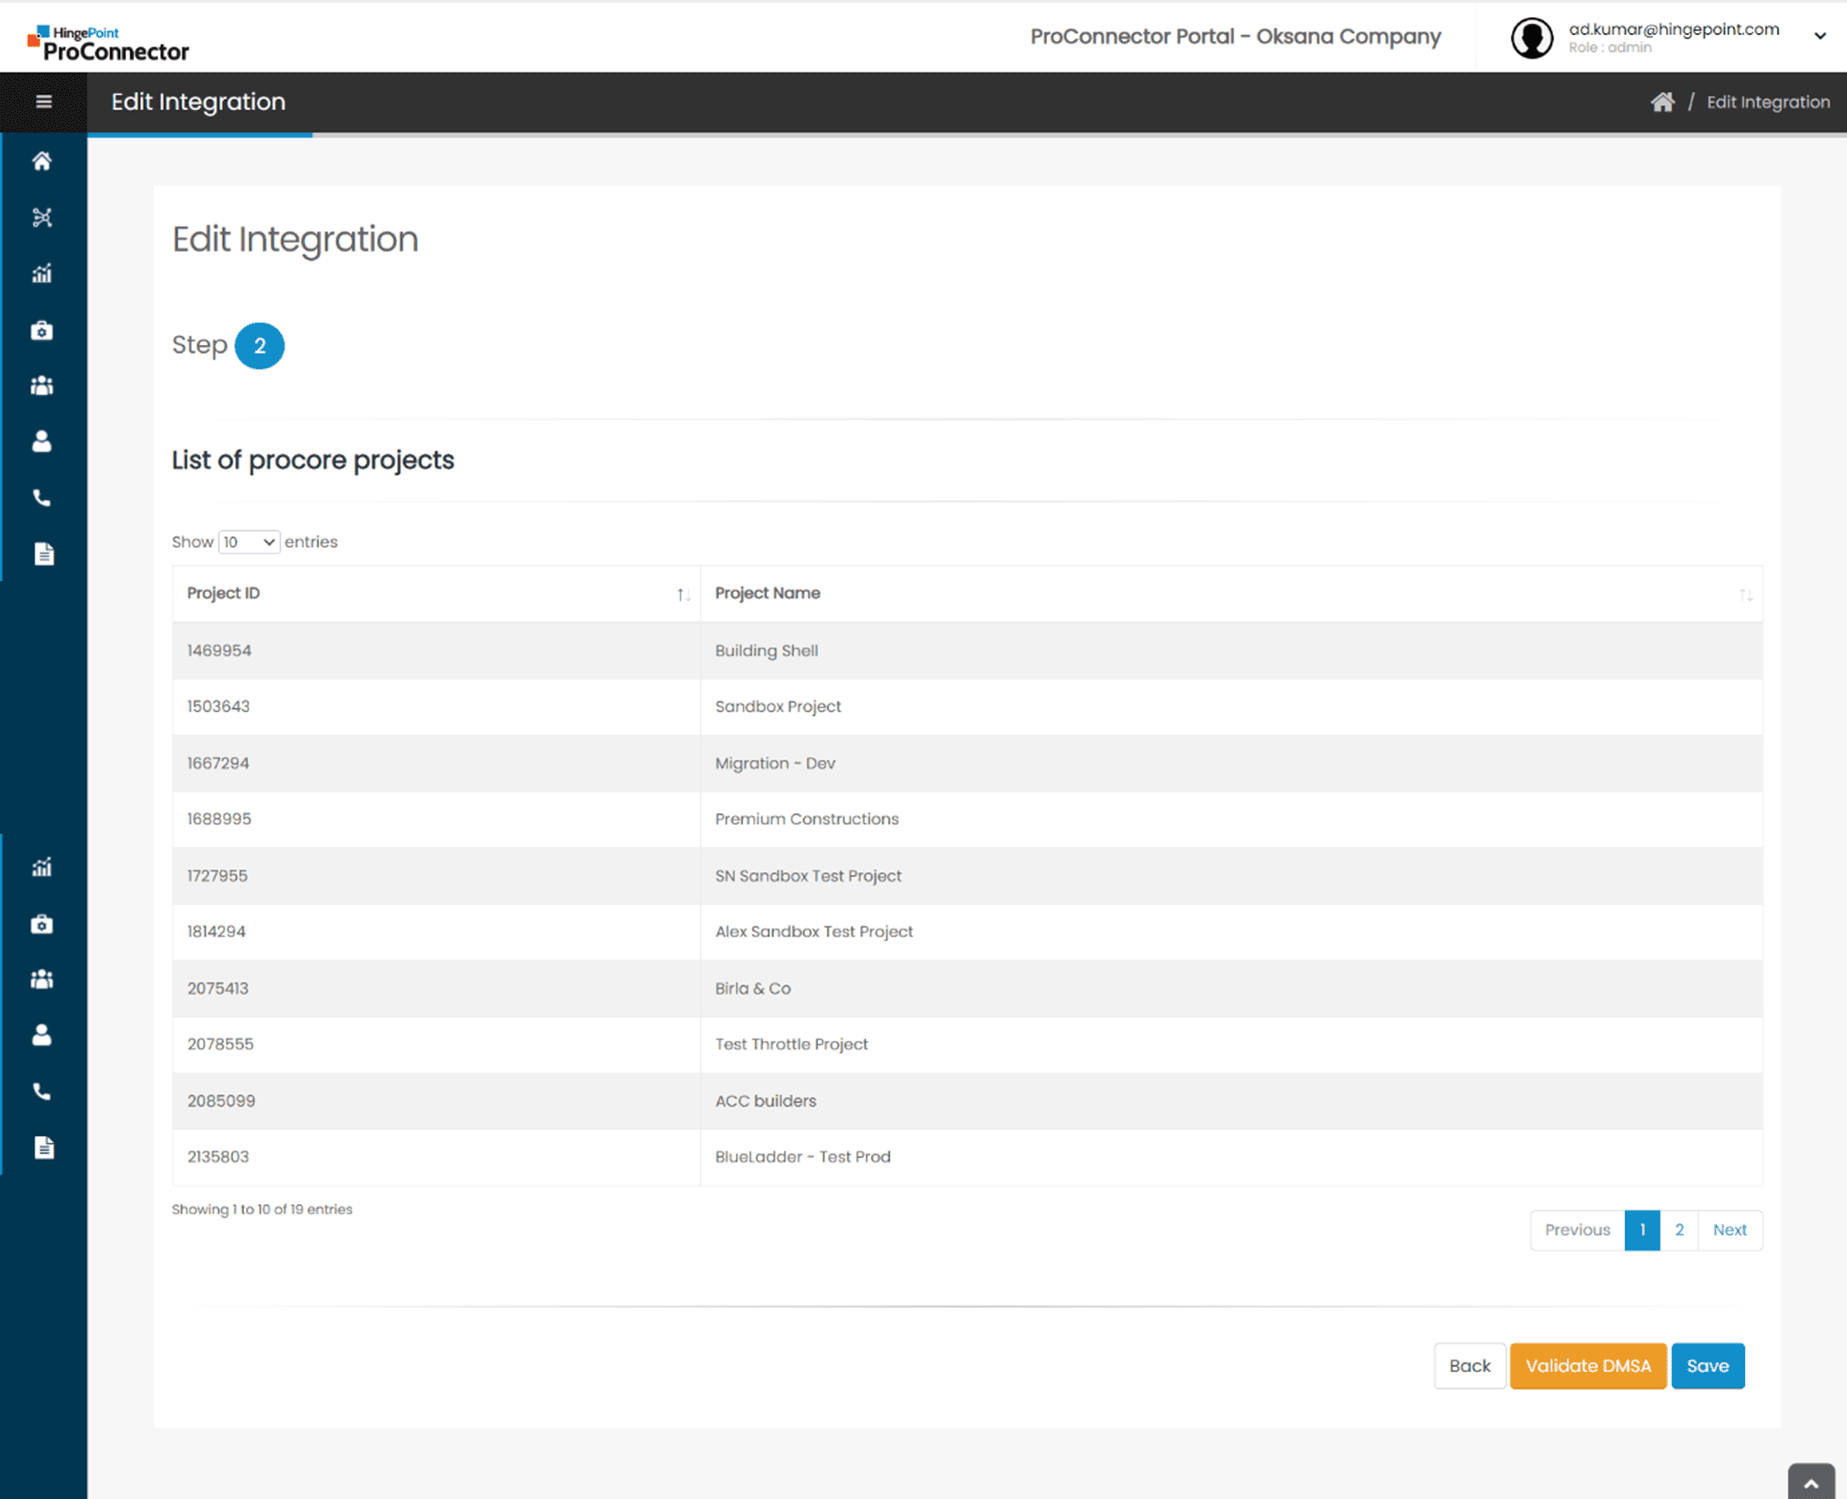
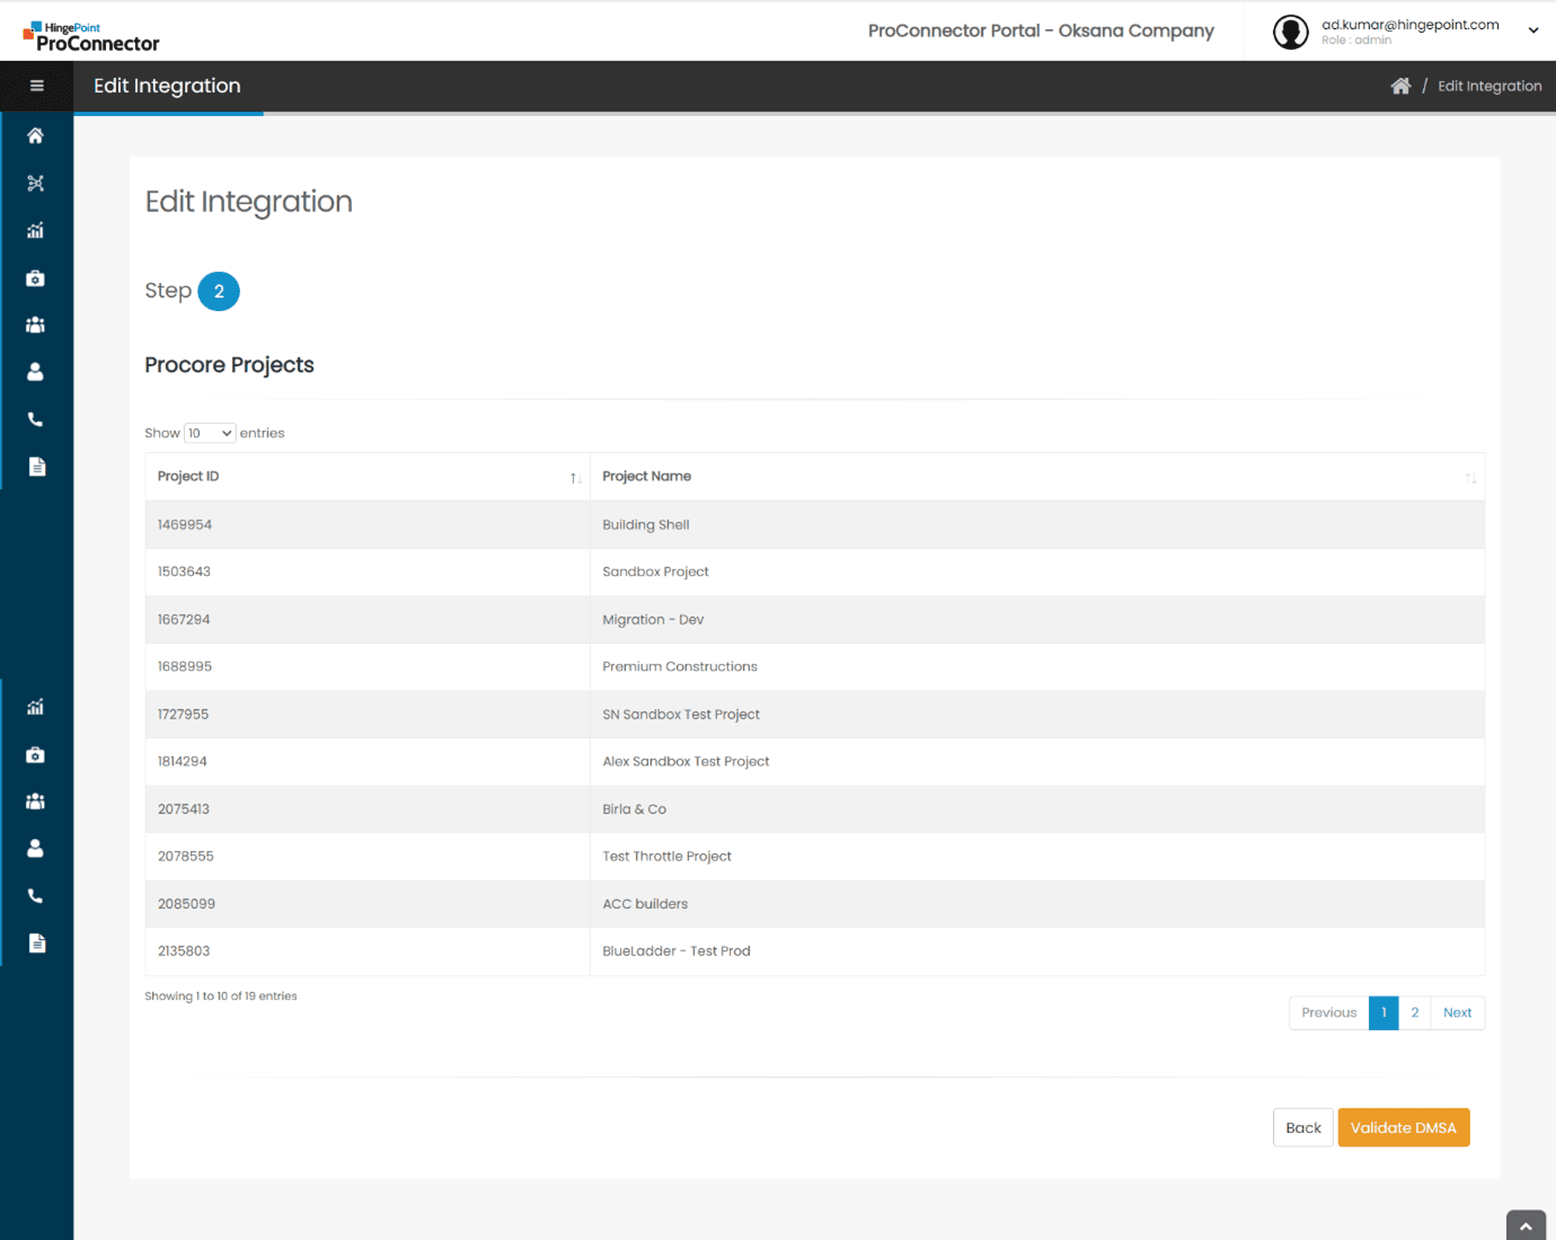
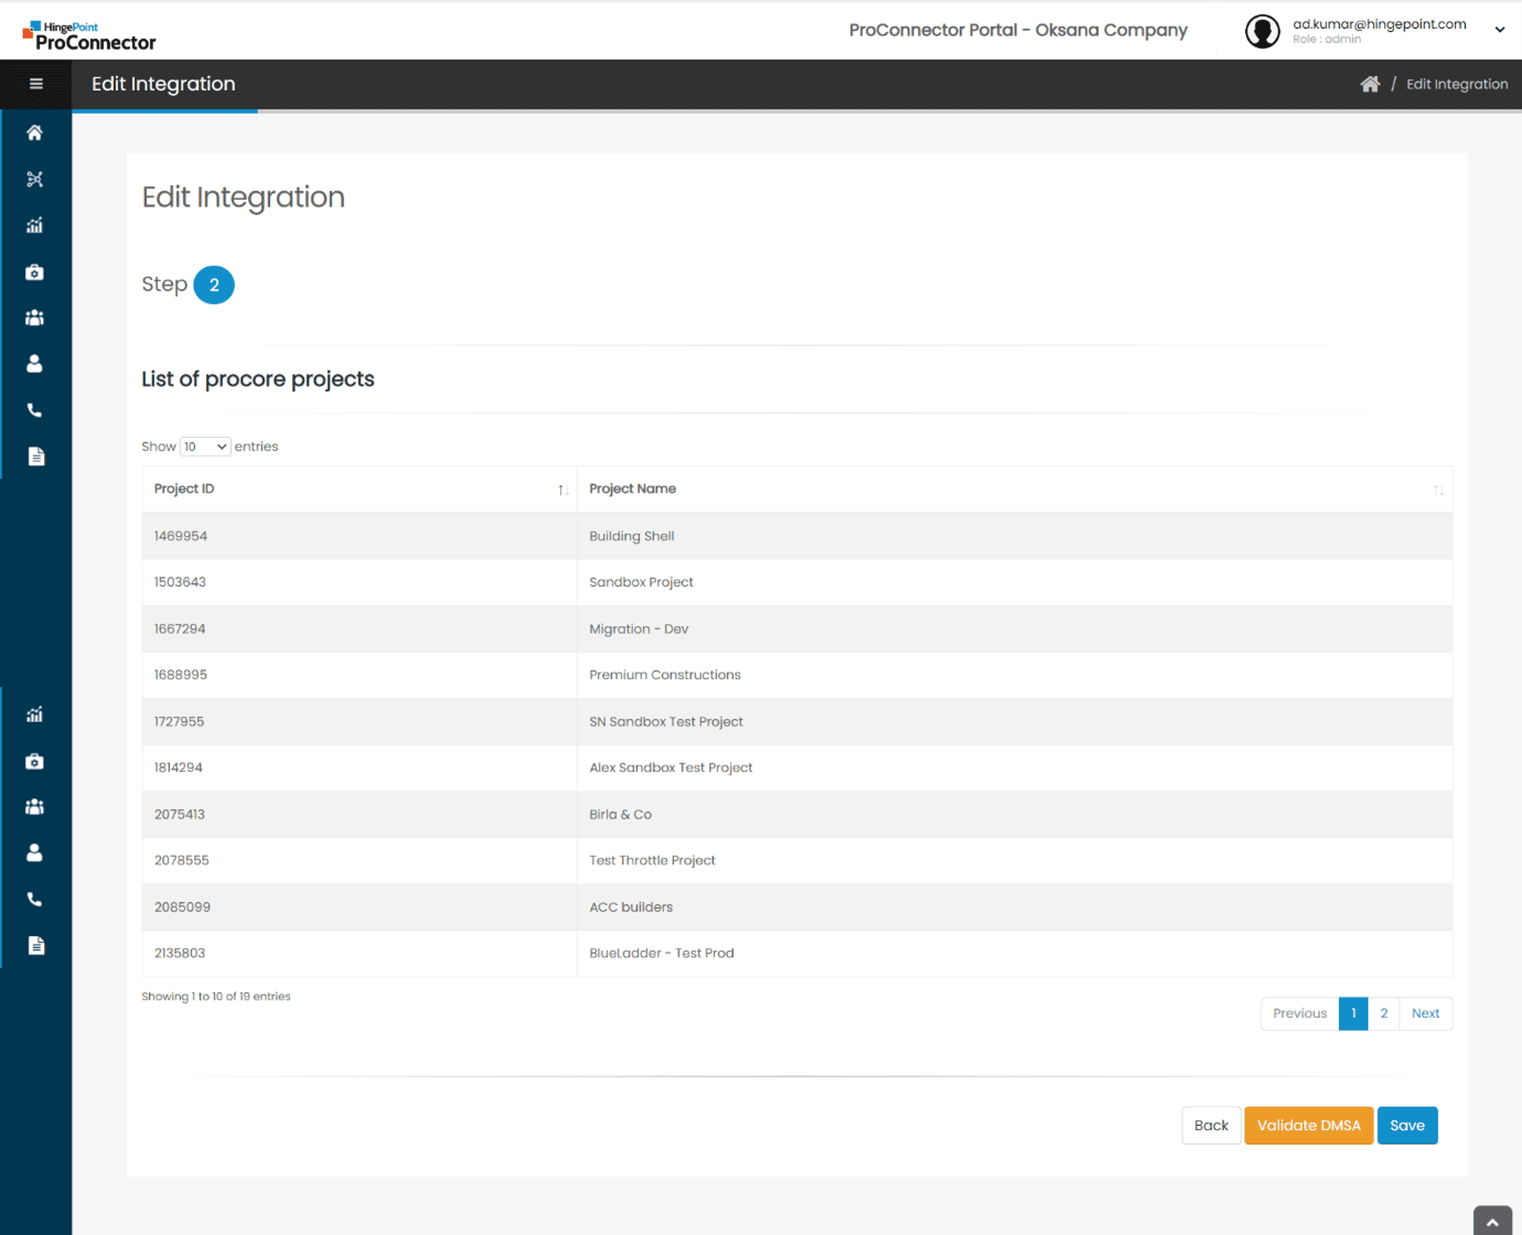
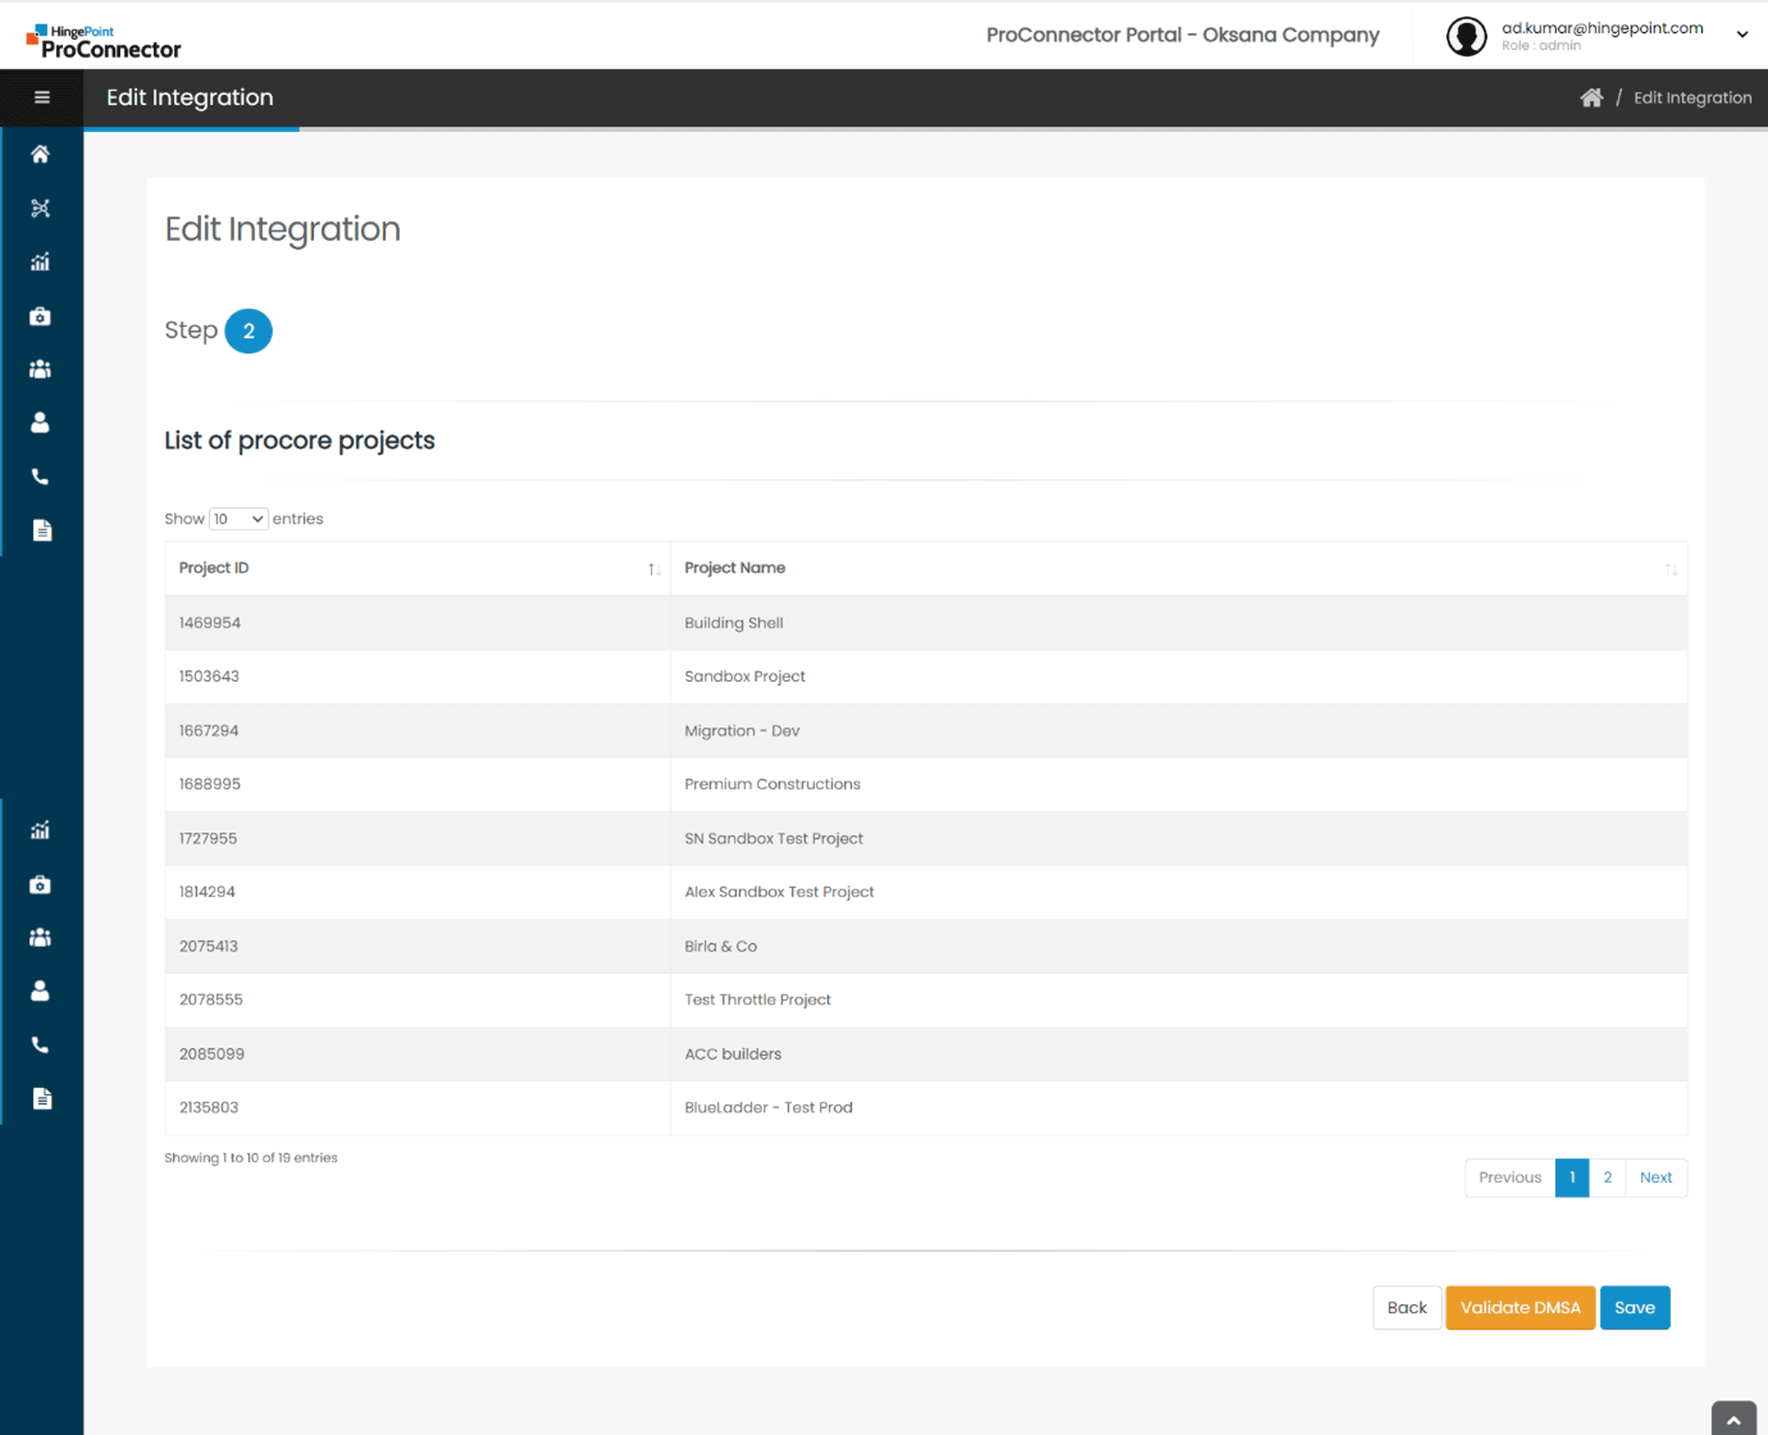
- In the Edit Integration page, Step 2, list of all the Procore Projects will be displayed.
- Click on Validate DMSA button.

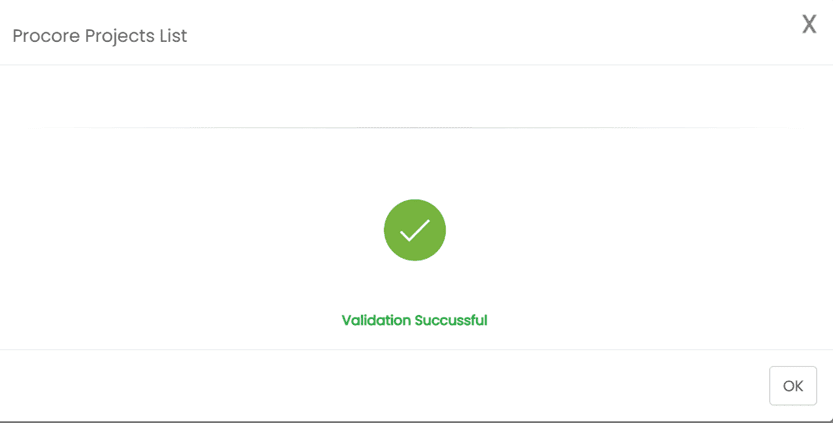
- If the validation is successful, success message will be displayed.

- Click on Ok and click on the Save button to save the changes.

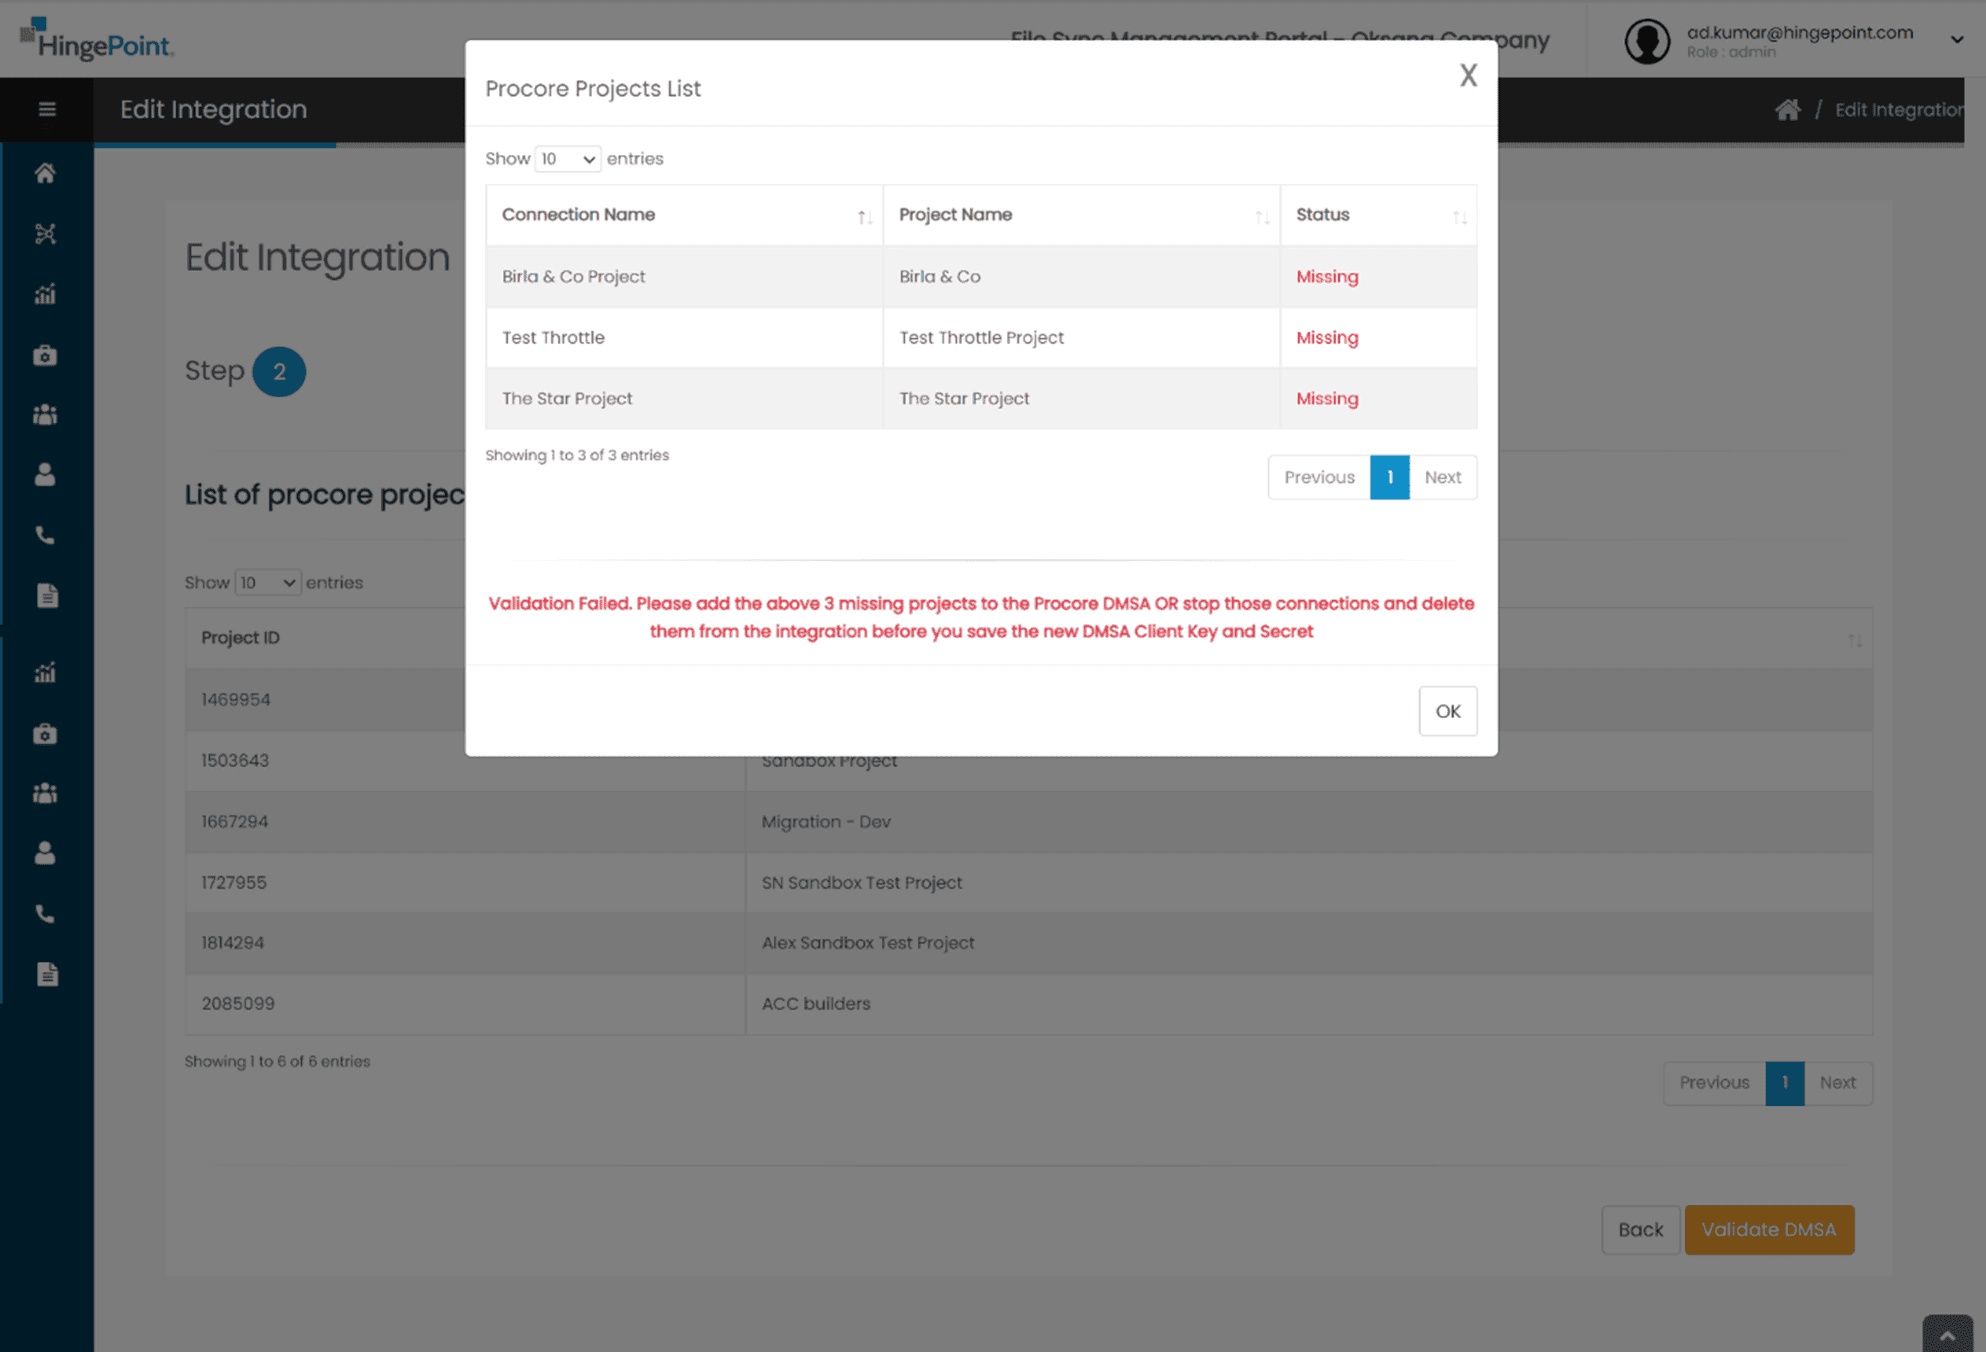
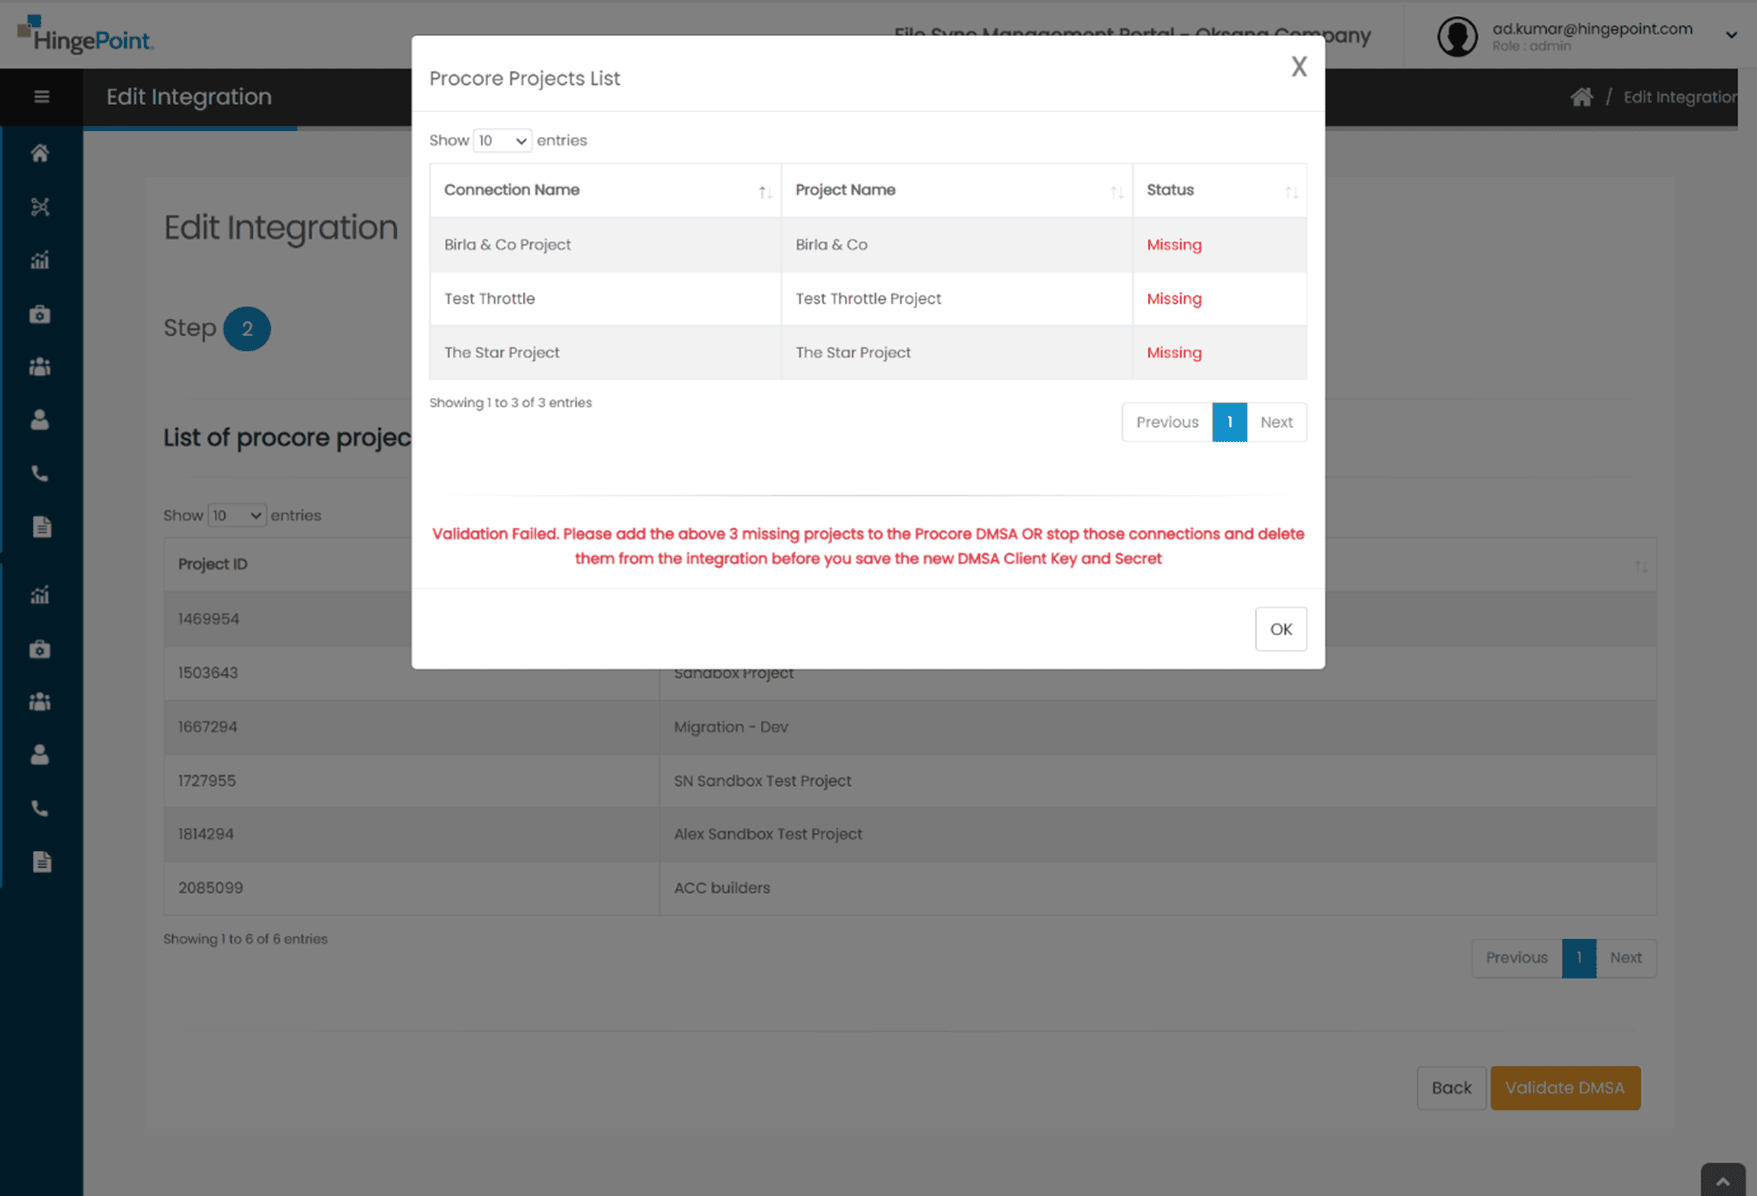
- If any of the Procore projects are not added into the DMSA app, validation failed message will be displayed with the list of all the Procore projects that are missing in the DMSA app.
- Unless all the Missing projects are added into the DMSA app, the Save button will be hidden and the user will not be able to save the new DMSA credentials.

- To add the above missing projects in Procore, navigate to Procore site
https://app.procore.com/ - Login to Procore and click on ‘Account & Admin Settings’

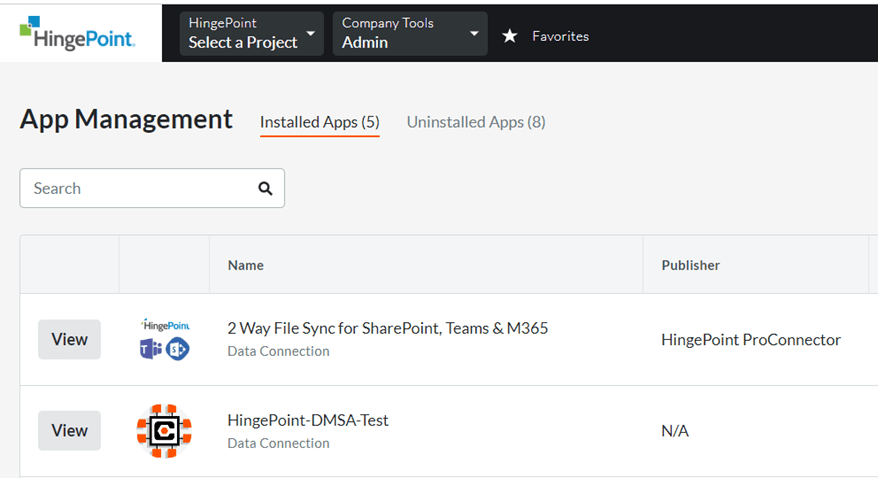
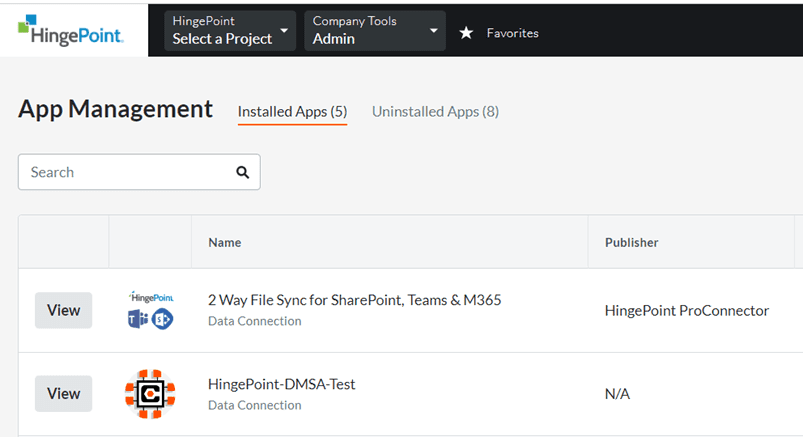
- Click on ‘App Management’ under Company Settings in the right-hand navigation menu
- Click on the View option next to your DMSA App

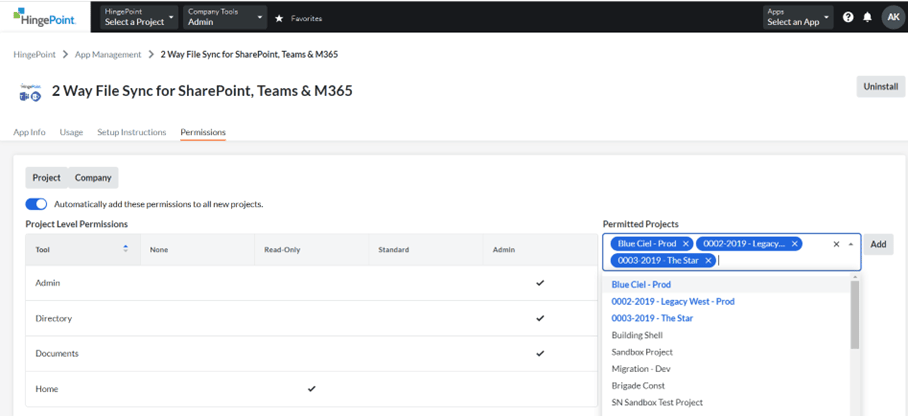
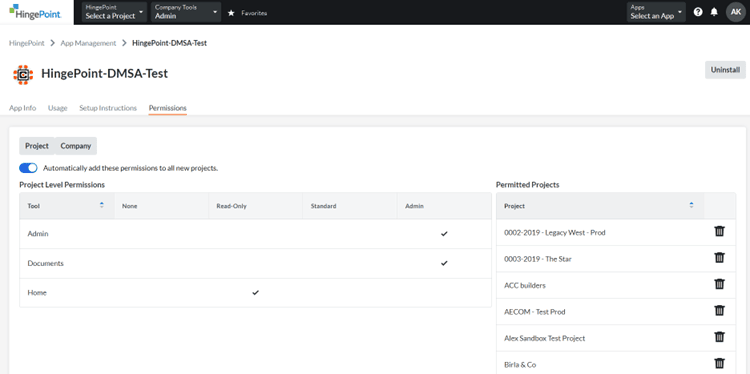
- Click on ‘Permissions’. Under Permitted Projects, use the ‘Select Projects’ drop-down to select all the Projects you want to apply the App configuration to and click on the ‘Add’ button.

- Once all the missing projects are added into the DMSA app, edit the Procore Integration and click on Validate DMSA button. [Follow the steps mentioned in Step 3 above to edit the Integration and validate the DMSA keys]
- If the validation is successful, success message will be displayed.

- Click on Ok and then click on Save button to save the changes.

- In the Edit Integration page, the TSA or Custom DMSA credentials will be displayed.
How to update an existing Procore Integration to use the DMSA Custom App keys?
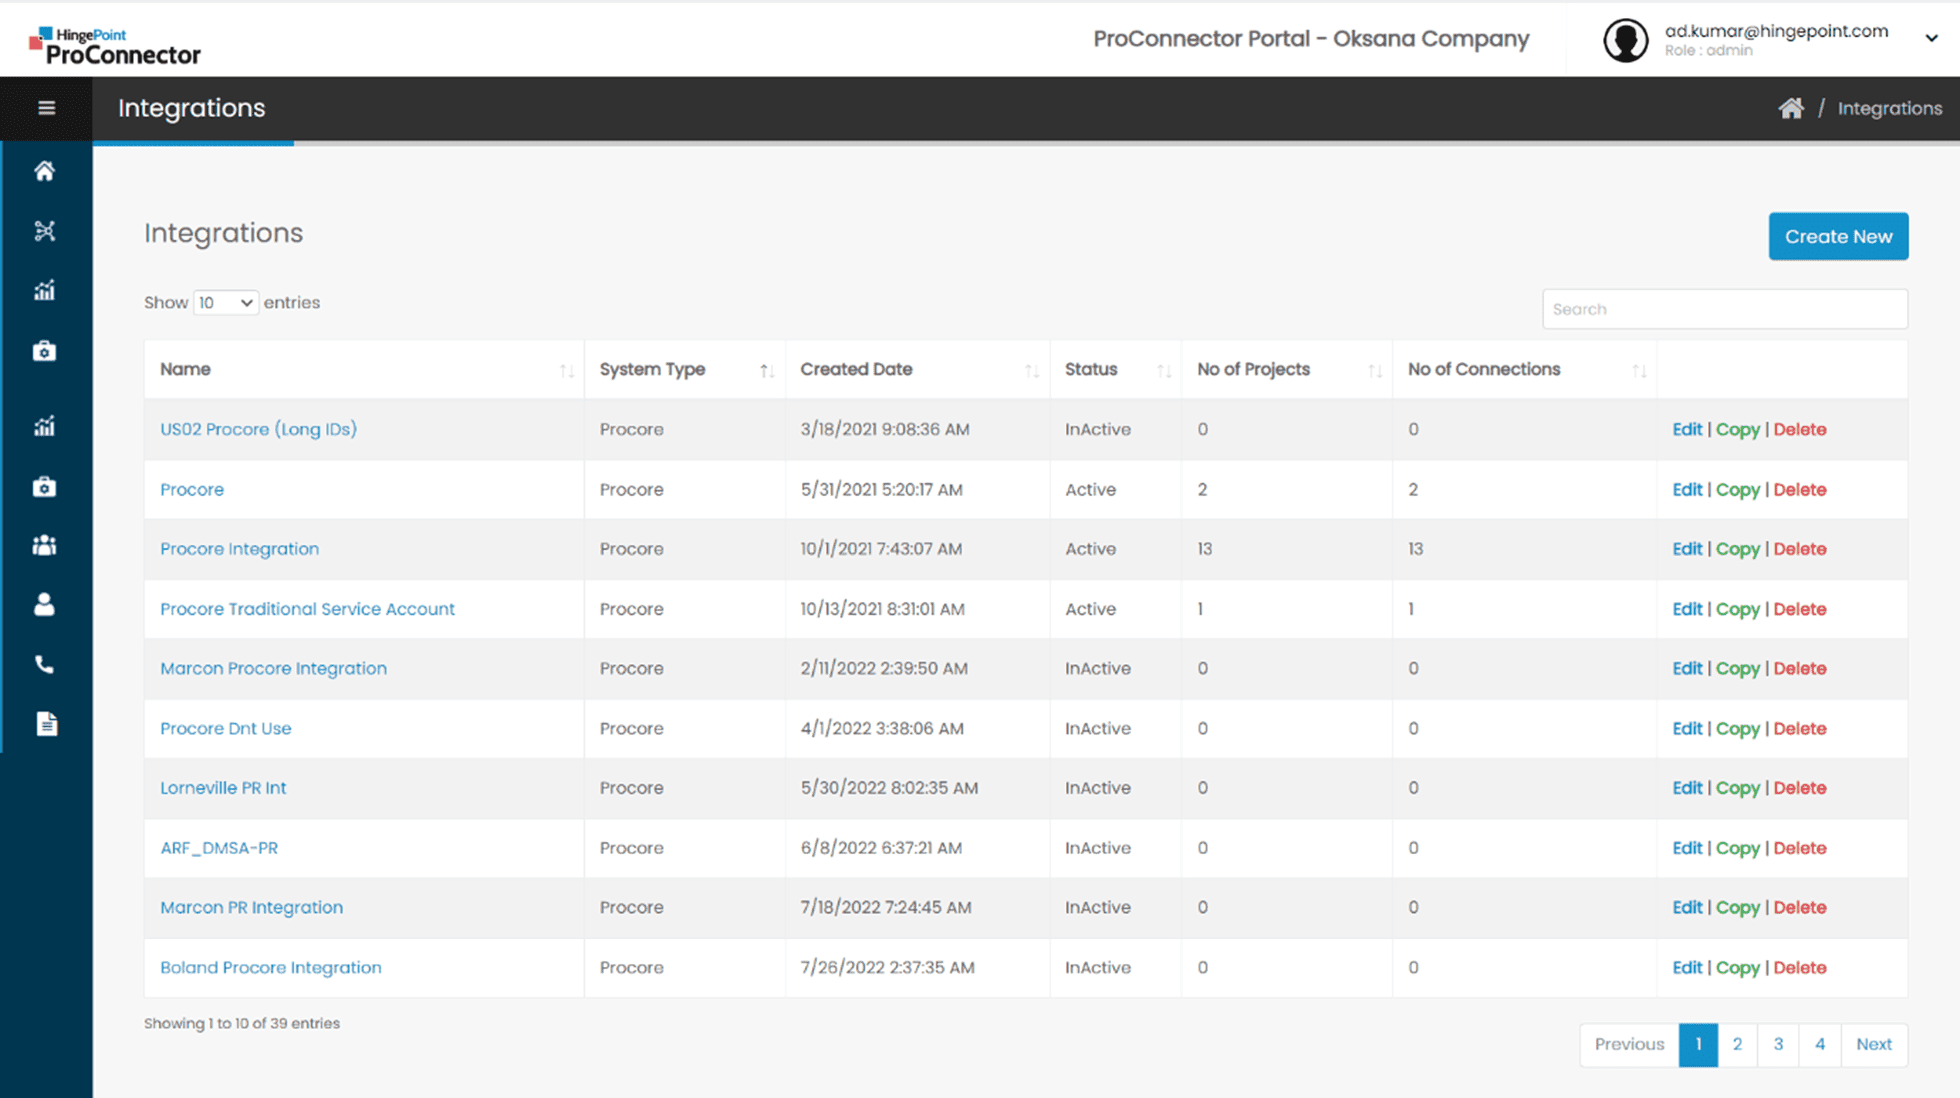
Step 1: Click on Integrations from the navigation menu
Step 2:
- Click on the Edit link of an existing Procore Integration which has the Traditional service Account keys

- In the Edit Integration page, the TSA credentials will be displayed.
- Edit the DMSA Client Key and Client Secret with the newly generated Custom DMSA App credentials
- Click on the Next button.

- In the Edit Integration page Step 2, click on Validate DMSA button.

- If the validation is successful, success message will be displayed.

- Click on Ok and click on Save button to save the changes.

- If any of the Procore projects are not added into the Custom DMSA app, validation failed message will be displayed with the list of all the Procore projects that are missing in the DMSA app.
- Unless all the Missing projects are added into the DMSA app, the Save button will be hidden and the user will not be able to save the new DMSA credentials.

- 10. To add the above missing projects in Procore, navigate to Procore site
https://app.procore.com/ - Login to Procore and click on ‘Account & Admin Settings’

- Click on ‘App Management’ under Company Settings in the right-hand navigation menu
- Click on the View option next to your DMSA App

- Click on ‘Permissions’. Under Permitted Projects, use the ‘Select Projects’ drop-down to select all the Projects you want to apply the App configuration to and click on the ‘Add’ button.

- Once all the missing projects are added into the DMSA app, edit the Procore Integration and click on Validate DMSA button. [Follow the steps mentioned in Step 3 above to edit the Integration and validate the DMSA keys]
- If the validation is successful, success message will be displayed.

- Click on Ok and then click on Save button to save the changes.


