01. Create Project
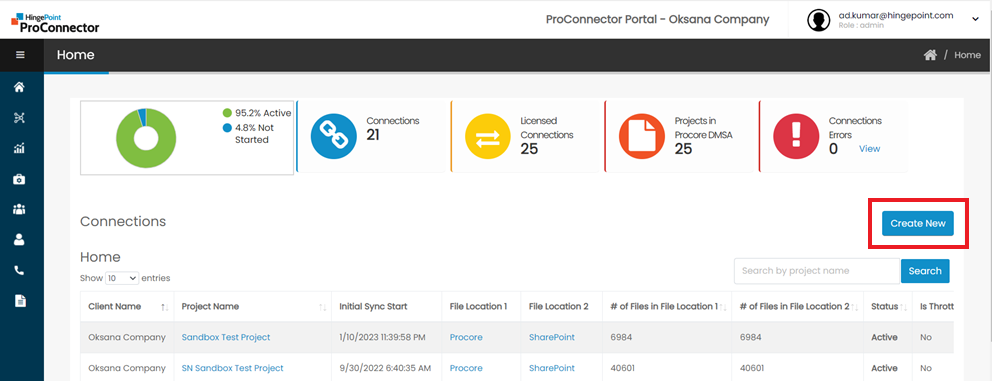
Step 1: Click on the Home icon from the left navigation bar to navigate to Dashboard page.

Step 2: In the Connections page, click on Create New button.

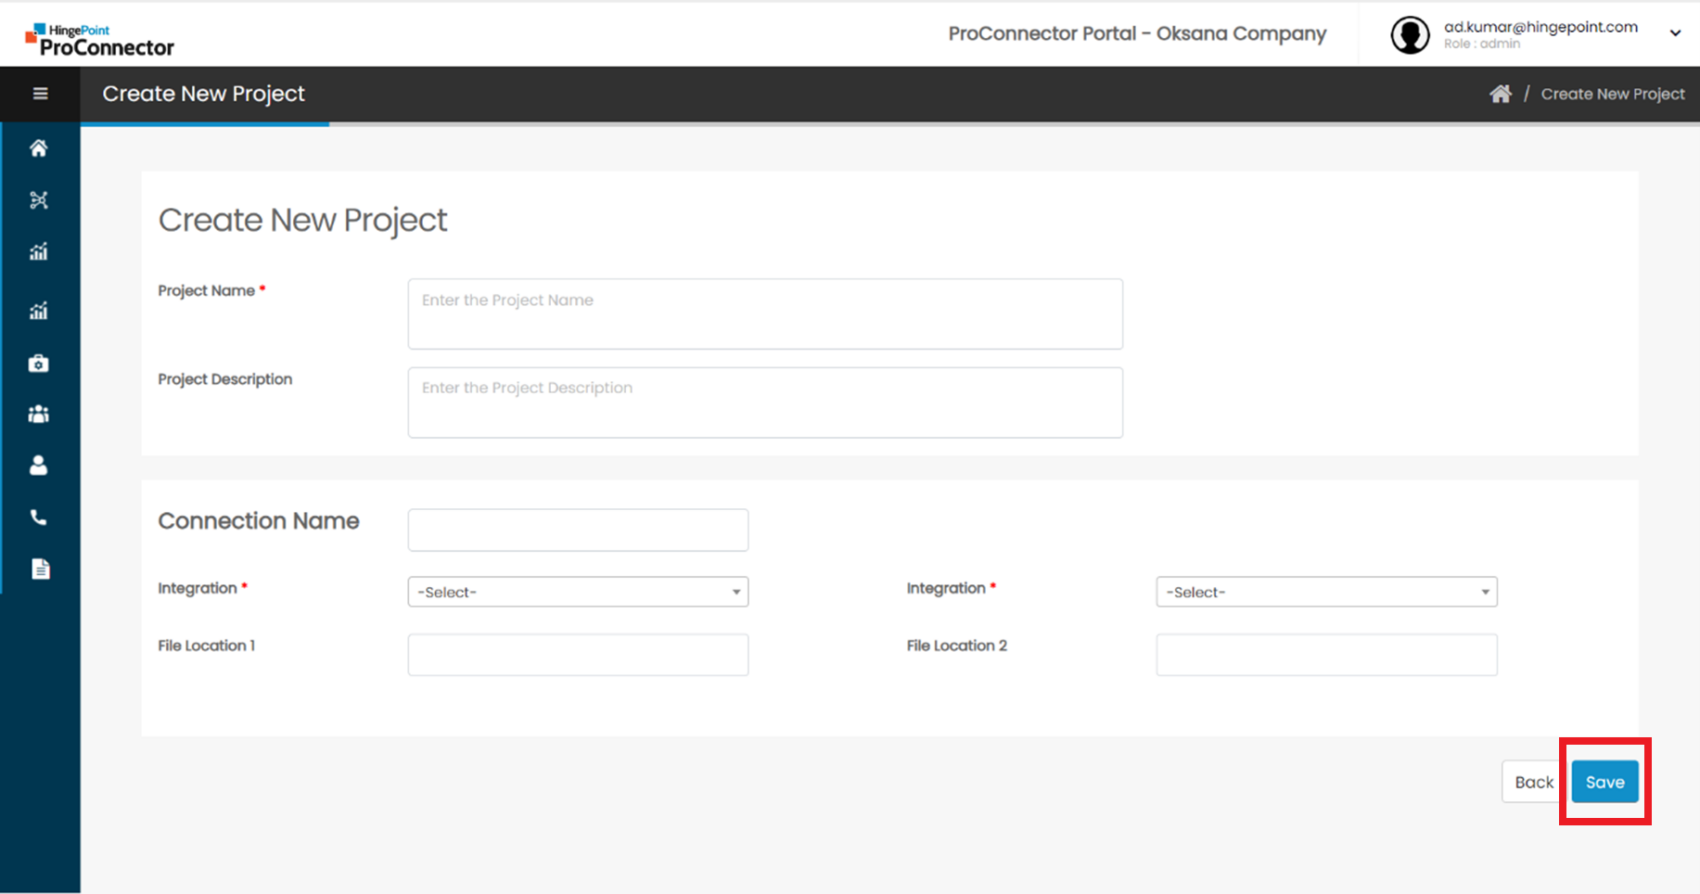
Step 3: Project Create Screen is displayed.

Step 4: Enter the Project Name. Select SharePoint and Procore integration from the dropdown in File Location 1 and File Location 2
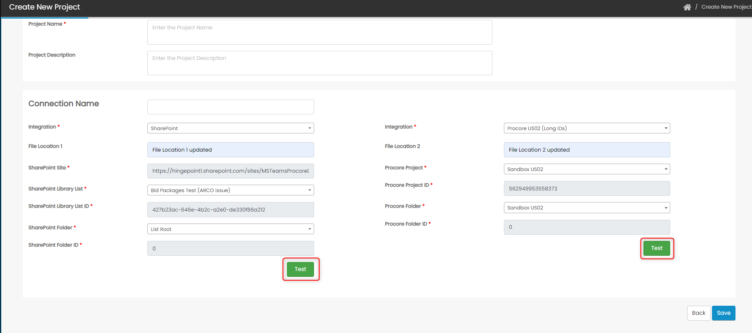
Step 5: For the selected SharePoint Integration, the SharePoint site URL will automatically populate. Select the SharePoint Library List and the SharePoint Library ID will automatically populate. Select the SharePoint Folder and the Folder ID will automatically populate. The user can select the Root folder or drill down the folders to select the sub folders.
Step 6: Select Procore Integration. The Procore projects will be listed and available in the dropdown. Select the Procore Project and the Procore Project ID will automatically populate. Select the Procore Folder and the Folder ID will automatically populate. The user can select the Root folder or drill down the folders to select the sub folders.
Step 7: Once all the fields are selected, click on the Test button to test if the Projects and folders exists.

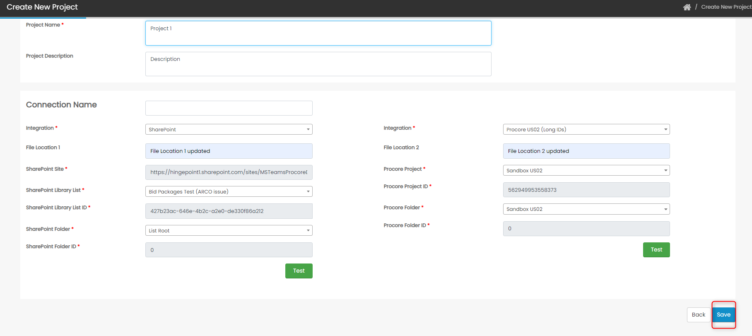
Step 8: Click on the Save button to save the new Connection.


